
SceneNode \ Management
 Cast SceneNode

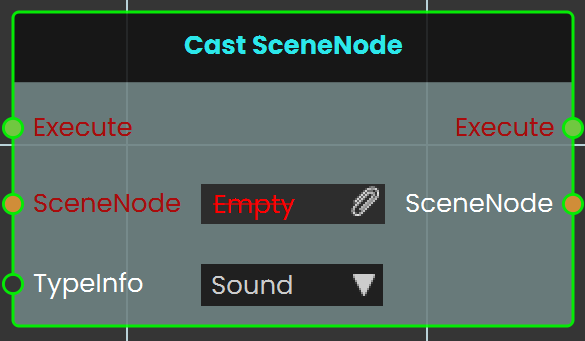
The Cast SceneNode enables the user to change the type of a SceneNode by selecting a typeInfo from the list, such as sound, 3D object, video, gadget, or camera. This node identifies the assigned SceneNode as the chosen type, allowing it to function accordingly within the VR environment.
Example
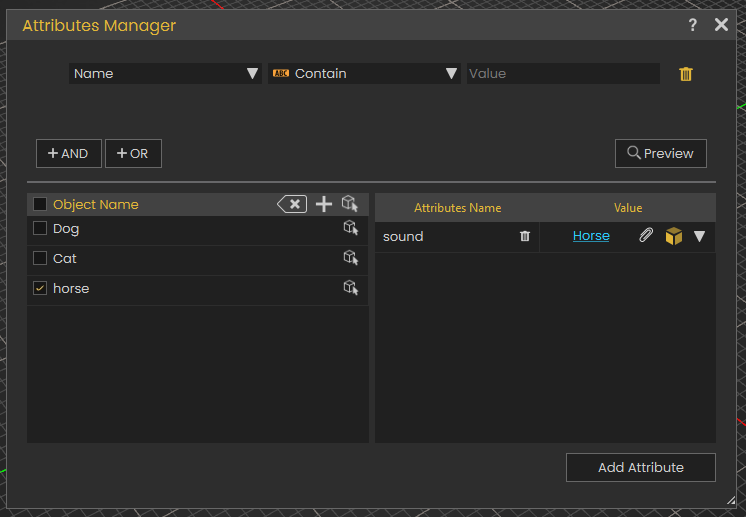
In this example, Animals sounds are assigned to the animals as SceneNode type

A Cast SceneNode is used to identify the SceneNode of an animal object (dog, cat, and horse) as a sound. An attribute named "Sound" is added to all three animals, and the corresponding sound is assigned to each. When the user triggers the animal SceneNode, the Cast SceneNode plays the sound assigned in the attribute.
 Set Node Collision Enabled
 The Set Node Collision Enabled node is used to enable or disable collision for the user. This can be utilized to allow the user to pass through objects or be blocked by them within the VR environment.
Example
In this example, the Set Node Collision Enabled node is used to disable collision for the user when the scene starts. The wall is assigned as the target object, and the collision is set to "False," allowing the user to pass through it.
This is shown in the following tutorial
Delete SceneNode
The Delete SceneNode node enables users to remove a specified object from the scene during a VR Experience. This node allows for dynamic scene modifications by deleting objects based on interactions or conditions, making the environment more interactive and adaptable. Once executed, the specified object is permanently removed from the scene.
Example
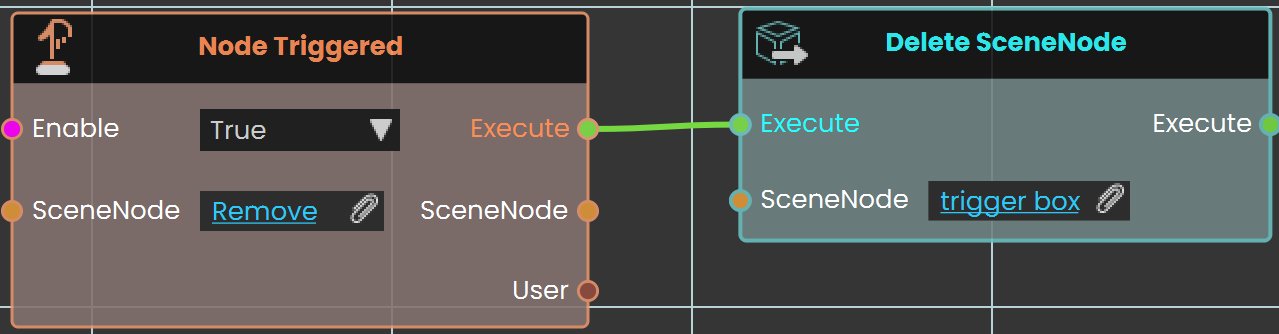
In this example, the Delete SceneNode node is used to remove a trigger box from the scene. The Node Triggered event is activated when the user triggers or clicks on an object named "Remove." As soon as the object is triggered, the Delete SceneNode node removes the trigger box from the scene, preventing further interactions with it.
 Enable Walk-Through
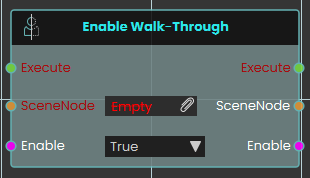
The Enable Walk-Through node explicitly controls the physical collision properties of a targeted 3D object within the VR Viewer. When activated, the node uses the boolean Enable input to determine the collision state of the specified SceneNode—allowing users to seamlessly pass directly through the object without physical obstruction if set to True.
 Find Node By Name
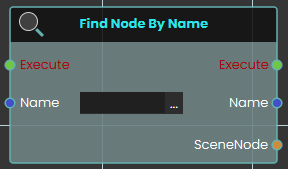
The Find Node By Name node searches the VR environment and dynamically locate a specific 3D object based on its assigned text identifier. When activated, the node takes the exact string provided in the Name input, searches the scene to find the corresponding object, and outputs that specific SceneNode reference.
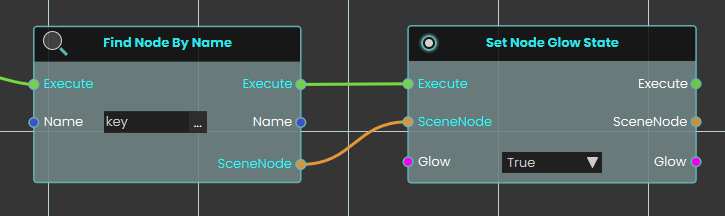
 Get Node Name
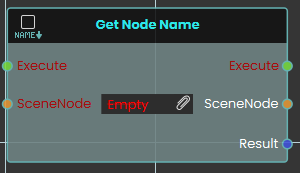
The Get Node Name node retrieves the exact text identifier of a specific 3D object within the scene. When activated, the node takes the targeted SceneNode input, extracts its assigned name, and outputs this text as a string value through the Result pin.
 Make Node Copy
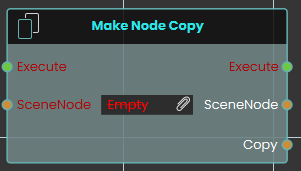
The Make Node Copy node duplicates a specific 3D object along with an independent copy of its material. Once activated, the node takes the targeted SceneNode input and generates a completely separate Copy, ensuring that any subsequent material or texture changes applied to this new object do not affect the original source.
 Make Node Instance
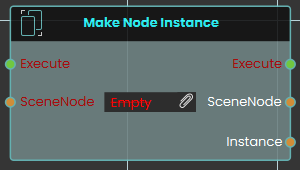
The Make Node Instance node generates a direct clone of a specific 3D object in the scene. When activated, the node takes the targeted SceneNode input and creates a new Instance that shares the exact same material properties as the original.
Example:
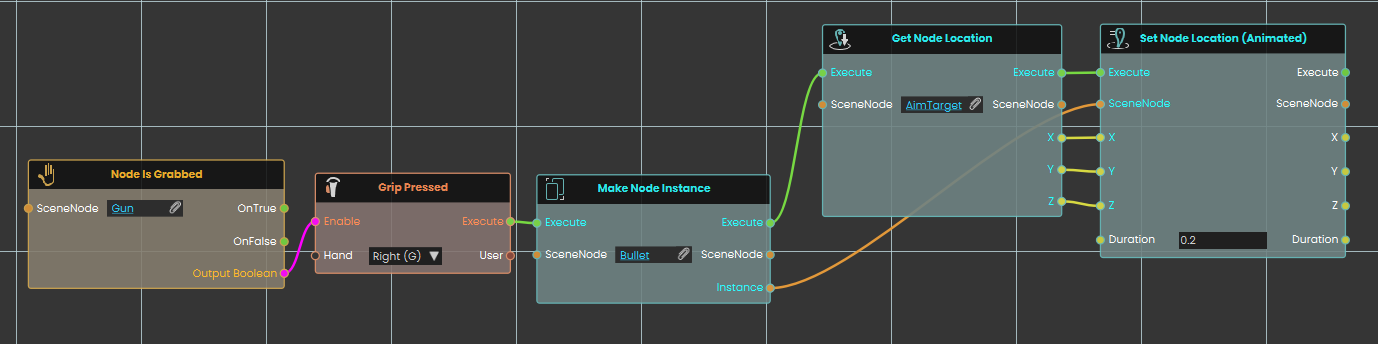
In this example, we create a simple shooting mechanic where firing a gun generates and shoots a bullet toward a target:
-
A Node Is Grabbed node continuously checks if the user is holding the "Gun" object, enabling the next node if the condition is met.
-
A Grip Pressed event node listens for the user to press the right hand's grip button, acting as the trigger to fire the weapon.
-
Once the grip is pressed, the Make Node Instance node activates, immediately generating a new instance of the "Bullet" object in the scene.
-
A Get Node Location node is then used to retrieve the exact X, Y, and Z coordinates of a specific "AimTarget" object.
-
Finally, a Set Node Location (Animated) node takes the newly generated bullet instance and smoothly moves it to the AimTarget's coordinates over a quick duration of 0.2 seconds, simulating a flying projectile.
 Set Node Simulate Physics
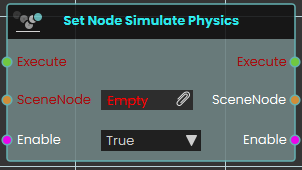
The Set Node Simulate Physics node activates or deactivates real-time physics calculations for a specific 3D object within the VR Viewer. When activated, the node uses the boolean Enable input to determine the object's physical state, allowing the object to react to gravity, collisions, and user interactions based on its assigned material physics properties
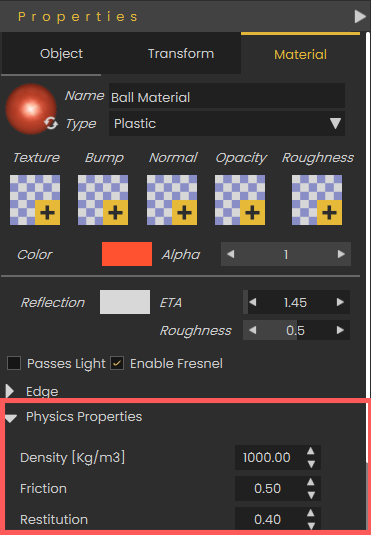
To configure how an object behaves during simulation, navigate to the Properties panel and select the Material tab. Under the Physics Properties section, you can adjust specific physical attributes for that material, such as its Density, Friction, and Restitution, which directly impact how the object interacts with the environment when physics are enabled.
 Is Same Node
Checks whether two scene nodes are the same node, and gives you a true/false answer.
What it does
You hand this node two scene nodes — SceneNode A and SceneNode B — and it tells you whether they are the same. The answer comes out of the Result port as true or false: true when the two are the same, false when they are different.
This node only looks — it never changes either scene node. Both scene nodes also come straight back out unchanged, so you can keep wiring from them to whatever should happen next.
Inputs
| Port | Type | What to connect |
|---|---|---|
| Execute | Trigger | Wire this from the previous node’s Execute output. |
| SceneNode A | Scene node | The first scene node you want to compare. |
| SceneNode B | Scene node | The second scene node you want to compare against the first. |
Outputs
| Port | Type | What you get |
|---|---|---|
| Execute | Trigger | Fires once the node has finished. |
| SceneNode A | Scene node | The same first scene node you connected, passed straight back out unchanged so you can keep wiring from it. |
| SceneNode B | Scene node | The same second scene node you connected, passed straight back out unchanged so you can keep wiring from it. |
| Result | True / false | True when the two scene nodes are the same, false when they are different. |
Example
| SceneNode A input | The Front Door node picked earlier in your script |
| SceneNode B input | The node the user just clicked |
| Result output | true if the clicked node is the Front Door, otherwise false |
Tips
- Wire the Result into a node that branches on true/false to do one thing when the two match and another when they don’t — for example, only open a door when the clicked node really is that door.
 Set Socket Node Enabled
Turns a snapping socket on or off, so you can control whether objects are allowed to snap into that spot.
What it does
A socket is a spot in your scene that objects can snap into — for example the place where a bolt seats into a housing, or where a tool clips onto a wall mount. This node lets you switch one of those sockets on or off while the scene is running. When you set it to on, objects can snap into the socket as usual; when you set it to off, the socket stops accepting anything, so nothing can snap there until you turn it back on.
This is handy for guiding a trainee through steps in order — you can keep a socket switched off until it is the right time to use it, then switch it on so the next part can be placed. The node only changes whether that socket is active; it does not move, snap, or remove anything already in the scene. It hands the same object and the same on/off value back out so you can keep wiring from them.
Inputs
| Port | Type | What to connect |
|---|---|---|
| Execute | Trigger | Wire this from the previous node’s Execute output to run the node at the moment you want the socket switched. |
| SceneNode | Scene node | The socket you want to switch — the snapping spot in your scene whose state you want to change, such as a BoltSocket_01. |
| Enable | True / false | Whether the socket should be on or off. Connect true to switch it on so objects can snap into it, or false to switch it off so nothing can snap there. |
Outputs
| Port | Type | What you get |
|---|---|---|
| Execute | Trigger | Fires once the node has finished, so you can continue to the next step. |
| SceneNode | Scene node | The same socket you put in, passed straight back out so you can keep wiring from it without looking it up again. |
| Enable | True / false | The same on/off value you put in, passed back out in case you want to reuse it further along. |
Example
| SceneNode input | BoltSocket_01 |
| Enable input | true — switch the socket on so the bolt is now allowed to snap into it |
| SceneNode output | BoltSocket_01, handed straight back so you can wire it into the next node |
Tips
- Keep a socket switched off until it is the right step, then switch it on — a good way to make sure parts are placed in the order you intend.
- Switching a socket off does not remove anything already snapped into it; it only stops new objects from snapping there.
No Comments