# VR Effects / Media Menu
This menu allows the user to add visual effects and dynamic elements to the VR Experience .
It is organized in the following groups:
- [**Particle**](https://simlab-soft.com/help/books/simlab-composer-11-help/page/vr-effects-media-menu#bkmrk-particles-group)
- **[Landscape](https://simlab-soft.com/help/books/simlab-composer-11-help/page/vr-effects-media-menu#bkmrk-landscape-group)**
- **[Media](https://simlab-soft.com/help/books/simlab-composer-11-help/page/vr-effects-media-menu#bkmrk-media-group)**
- **[UI Panels](https://simlab-soft.com/help/books/simlab-composer-11-help/page/vr-effects-media-menu#bkmrk-ui-panel-group)**
[ ](https://simlab-soft.com/help/uploads/images/gallery/2022-10/image.png)[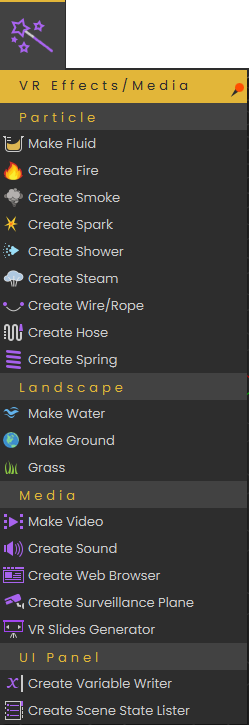](https://simlab-soft.com/help/uploads/images/gallery/2024-01/Qreimage.png)
### Particles Group
Includes the below visual effects supported in SimLab Composer/VR Studio:
[Make Fluid](https://simlab-soft.com/help/link/178#bkmrk-create-fire-and-smok)
[Create Fire](https://simlab-soft.com/help/books/simlab-composer-help/page/vr-effects-media-menu#bkmrk-create-fire-and-smoke)[Create Smoke](https://simlab-soft.com/help/books/simlab-composer-11-help/page/vr-effects-media-menu#bkmrk-create-fire-and-smok)[Create Spark ](https://simlab-soft.com/help/books/simlab-composer-11-help/page/vr-effects-media-menu#bkmrk-create-spark)
[Create Shower](https://simlab-soft.com/help/books/simlab-composer-11-help/page/vr-effects-media-menu#bkmrk-create-shower)
[Create Steam](https://simlab-soft.com/help/books/simlab-composer-help/page/vr-effects-media-menu#bkmrk-create-steam)
[Create Wire/Rope](https://simlab-soft.com/help/books/simlab-composer-help/page/vr-effects-media-menu#bkmrk-create-wire%2Frope)
[Create Hose](https://simlab-soft.com/help/books/simlab-composer-help/page/vr-effects-media-menu#bkmrk-create-hose)
[Create Spring](https://simlab-soft.com/help/books/simlab-composer-11-help/page/vr-effects-media-menu#bkmrk-create-spring)
##### Make Fluid
Enables users to convert selected 3D shapes into fluids. To learn more about this feature check the following tutorial:
##### Create Fire and Smoke
Enables the user to add fire effect to the scene, this can be a large trailing fire, a stove, or a candle.
Fire effect automatically includes smoke option to be shown with the fire. If the user wants smoke alone without fire, then **Create Smoke** can be used.
The following tutorial shows the process of creating fire and smoke in Composer/VR Studio:
#### Create Spark
Spark effect can be used to show electrical sparks, or welding effect. The following tutorial shows how to create the spark effect:
##### Create Shower
For creating moving water or liquid effect in SimLab Composer or VR Studio, this can be done using shower effect. It allows the user to control color, speed and strength of water flow. The following tutorial shows the process of creating the shower effect:
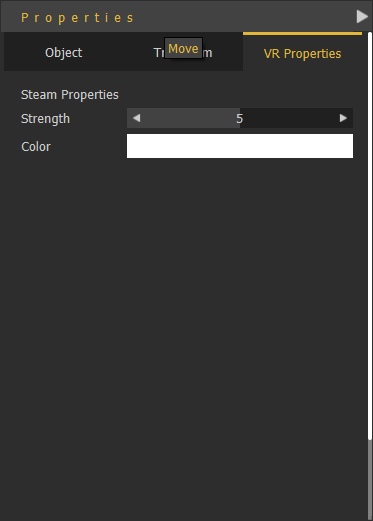
##### Create Steam
Creates steam effect in the VR Experience with the VR Properties shown below. The user can change the steam strength and color in the Properties dialog.
[](https://simlab-soft.com/help/uploads/images/gallery/2022-10/RVzimage.png)
##### Create Wire/Rope
Creates connecting wires in the scene, like connecting the soldering kit shown below with its electric plug.
[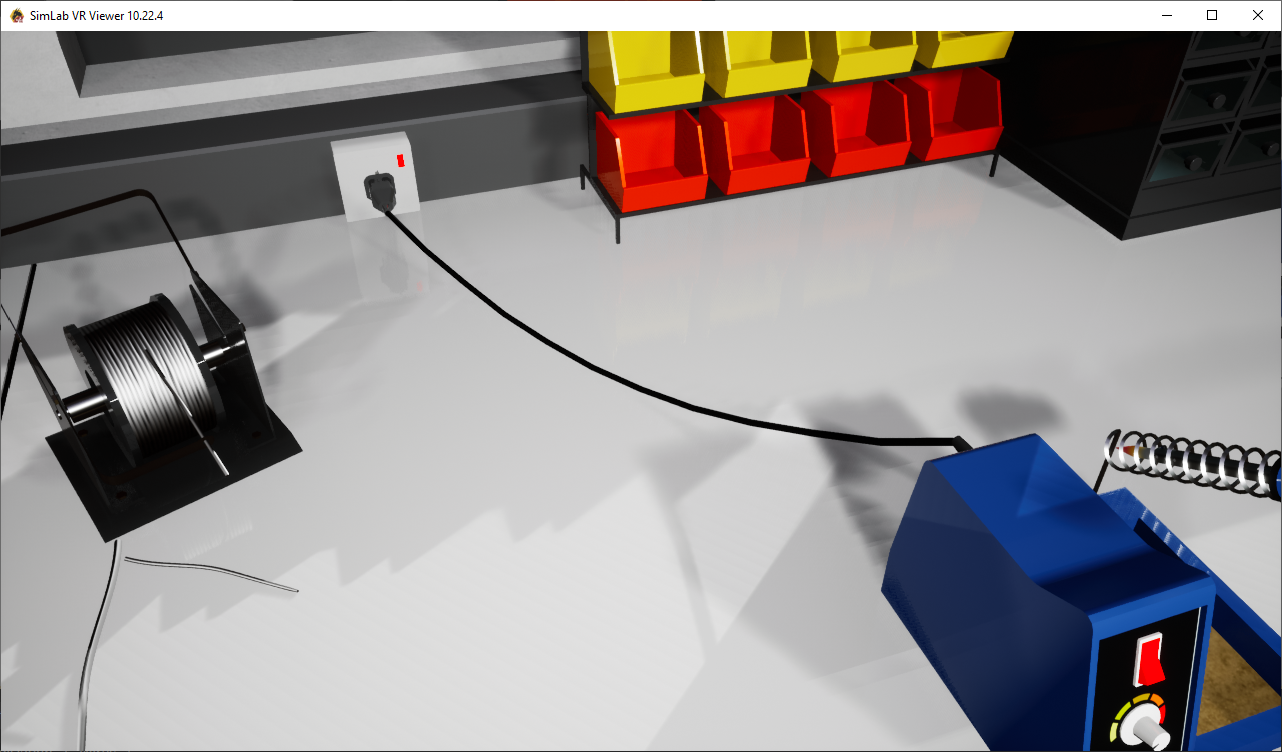](https://simlab-soft.com/help/uploads/images/gallery/2021-12/create-wire2.png)The following tutorial shows the process of creating a wire:
##### Create HoseClicking this tool will create two points in the 3D area, a start point and an end point. Adjust their location to the desired location. For more about this tool check this [tutorial](https://youtu.be/F0o_tARqGl4).
##### Create Spring
Creates a 3D spring model with the length specified by the start and end points selected by the user. A 3D Geom for the spring will be added to the Scene Browser with its two endpoints. These points can be selected and transformed, thus changing the shape/length of the spring.
[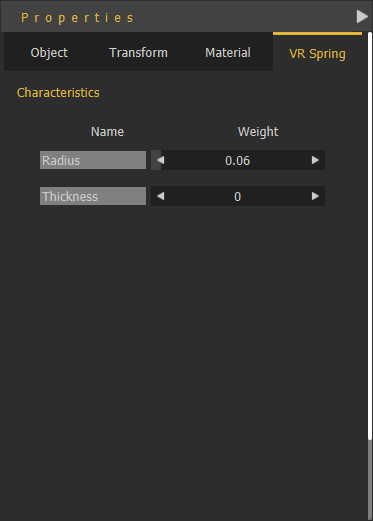](https://simlab-soft.com/help/uploads/images/gallery/2022-10/LR1image.png)With the created spring selected, its Properties panel will appear, VR Spring properties Radius, and Thickness can be edited.
### Landscape Group
#### Make Water
Make water works on one object or group of objects, the process is as follows:
1. From the **Effects** menu » select **Make Water**.
2. Select 3D object(s) to become water, then click [](https://simlab-soft.com/help/uploads/images/gallery/2022-01/image-1641559302867.png)
In the **Scene Browser** notice that the shape of the icon for the 3D object(s) has changed to a water shape.
The water settings can be adjusted from the **VR Water** tab in the **Properties** dialog. Water settings are:
- **Water Color:** The user can select a color to use for the water.
- **Water Depth,** **Water Speed, Water Turbidity, Wave Speed, Wave Size and Wave Roughness:** These parameters can be used to make more realistic water surface.
[](https://simlab-soft.com/help/uploads/images/gallery/2021-12/image-1640854173697.png)
To remove the water effect, from **Scene Browser,** top combo box, select VR Landscape. An 'X' mark will appear next to the water geometry, click it to remove the water effect.
[](https://simlab-soft.com/help/uploads/images/gallery/2022-01/5NYremove-water.png)
#### Make Ground
Ground objects are objects the user can teleport to in VR. By default the user does not need to set ground objects. Any object with good orientation (has normal close to the up vector) is considered ground.
If the user wants to have more control and wants to prevent others from moving all around the scene, the user can use **Make Ground** to define the object(s) the user can teleport to. When **Make Ground** tool is used, **default ground is turned off**, and only objects defined as ground by the user are considered as ground
Push and hold the stick on a VR controller to activate teleportation mode. Then Release to teleport to a valid destination.
- A **green teleportation** pointer indicates possible teleportation on an object.
- A **red teleportation** pointer indicates forbidden teleportation on an object.
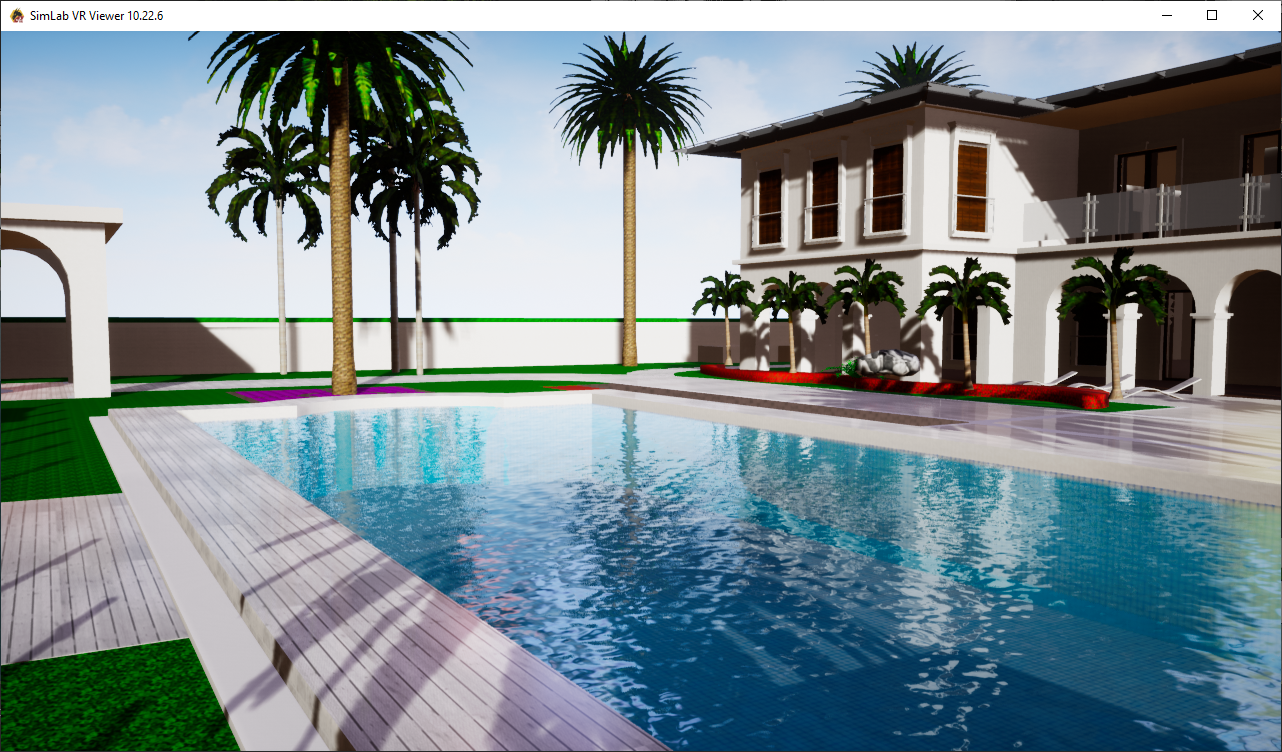
#### Grass
Enable users to add realistic grass effect to VR scenes. Selecting this VR effect will open the VR Grass Generator dialog.
[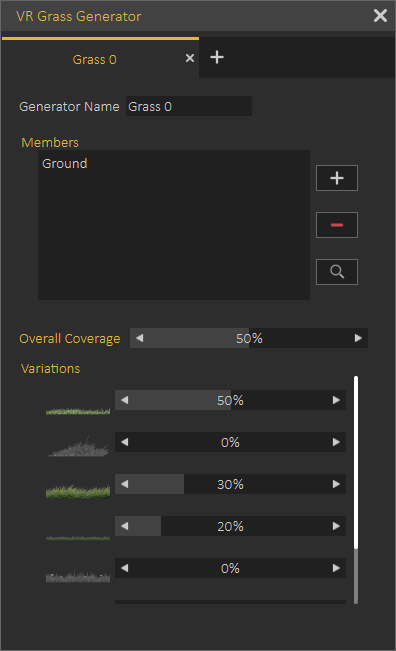](https://simlab-soft.com/help/uploads/images/gallery/2021-12/image-1640855433922.png)
VR Grass Generation dialog allows the user to control:
- Generator Name
- Geometry the grass should be added to, select the geometry then click (+)
- Overall Coverage with grass from the selected object
- The percentage of the different kinds of grass to be generated
The following video shows a sample of Grass effect in action:
The following tutorial shows how to use grass in Composer or VR Studio:
### Media Group
#### Make Video
With Make Video effect, the user can convert any 3D object to a video player. The video should be an **MP4** file.
The user can use a URL link in which case the video will be streamed during the VR Experience, or a local link for a file on the users machine. Local videos are automatically added to the VR Experience package, so the videos can still play when VR Experiences are distributed
The following dialog shows the VR Video properties:
[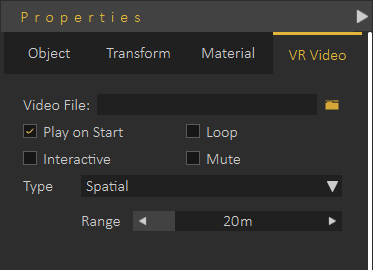](https://simlab-soft.com/help/uploads/images/gallery/2021-12/image-1639765420586.png)
To learn how to use Video effect in VR, check the following tutorial:
#### Remove Video
To remove a video click the "X" mark in the Scene Browser next to the 3D geometry including the video.
[](https://simlab-soft.com/help/uploads/images/gallery/2021-12/image-1639765500793.png)
**Video Action** response in VR Training Builder can be used to control the Video play in VR. It can be used to pause, play, toggle, or seek in VR, as a response to an event. For more info about Video Actions in VR Training Builder check this [tutorial](https://youtu.be/96HWC7eufGk).
#### Create Sound
This function adds 3D Sound object to the scene, and the **Scene Browser**. Selecting the 3D Sound form the tree will display its properties in the **Properties Panel**, **VR Sound** tab. The 3D sound object occupies a location in the 3D scene.
The user can determine if the sound should be played on start of the scene, or not. To be played once or in a loop.
The type of the 3D Sound can either be **Spatial**, which means the sound volume is automatically affected by the location of the 3D sound in the scene, or **Constant**. Constant sounds when played has the same volume in all areas of the scene.
[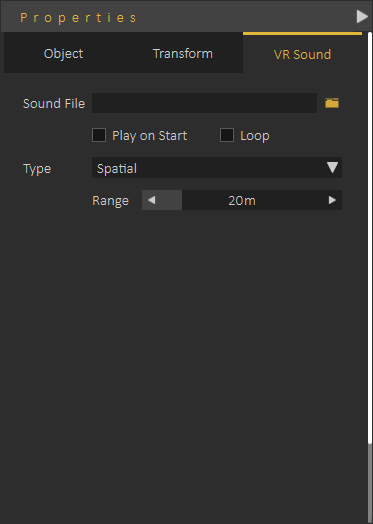](https://simlab-soft.com/help/uploads/images/gallery/2021-12/image-1640856128399.png)
For more information about VR Sound check this **[tutorial](https://youtu.be/Pv1OFdxb8dE)**
### Create Web Browser
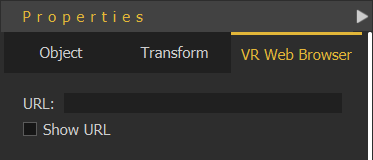
Adds a flat screen **VR Web Browser** element to the Scene Browser, and the 3D area. In the Properties dialog under the **VR Web Browser** tab the user can input the URL for the browser to display.
[](https://simlab-soft.com/help/uploads/images/gallery/2021-12/image-1640856957969.png)
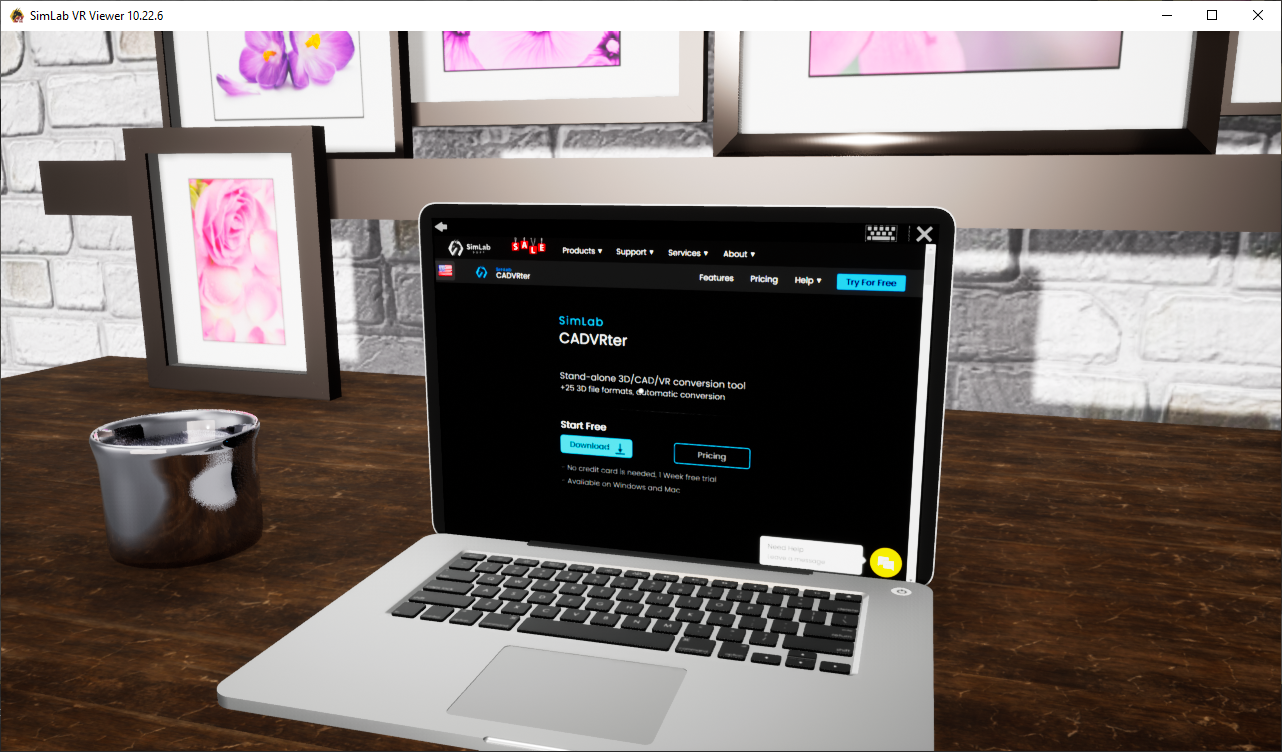
The user can change the width and height of the Web Browser plane using the white points that appear on it when selected. The web browser can be placed on a PC screen, or a full wall in the VR Experience.
[](https://simlab-soft.com/help/uploads/images/gallery/2022-01/wbbvr-webbrowser.png)
#### Create Surveillance Plane
**Surveillance Plane** allows the user to view far or not easy to view parts of the scene using **a VR Camera**. VR Surveillance plane is linked to the camera so it shows what the camera is seeing. The following tutorial shows how to use **VR Surveillance.**
Creating **VR Camera** is available under **VR Viewer menu.**
[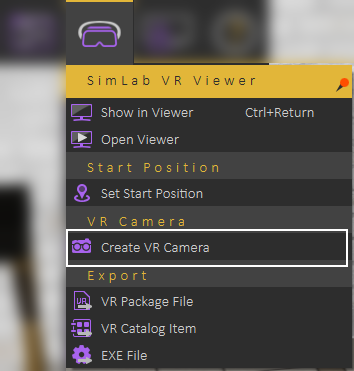](https://simlab-soft.com/help/uploads/images/gallery/2021-12/image-1640857427829.png)
#### VR Slides Generator
PowerPoint presentations or PDF files generated in the past can now be utilized easily in VR Experiences. In few clicks you will be able to get the presentation and optionally a small podium version of it for an amazing VR Experience.
VR Slides Generator tool will automatically create the needed training builder blocks to make it easy to utilize slide switching as an event, for example to show/hide a 3D object that works well with[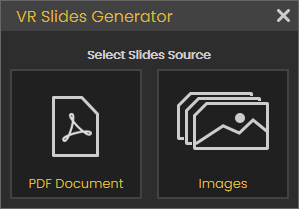](https://simlab-soft.com/help/uploads/images/gallery/2023-06/Ytximage.png) your presentation. To learn more about this tool check this **[tutorial](https://discordapp.com/channels/1062715275805470821/1072111738184552478).**
###
### UI Panel Group
#### Create Variable Writer
This tool enables the user to track the value of a **VR Variable** in the VR experience.
Click [Here](https://simlab-soft.com/help/link/22#bkmrk-variables-and-expres) to learn more about creating VR Variables.
The value of the variable will be updated dynamically, so whenever the variable value changes the variable writer will be updated to show the new value of the variable. The user can control the size, and place for the variable writer, so it can be aligned on a wall in the scene or on a monitor.
User selects which variable to view, color of the text, and prefix text.
You can also change its horizontal and vertical text alignment, check **"Max String Length"** to keep the font size fixed, and finally check **"Editable"** if you want to be able to edit the variable that it contains directly while running the VR Experience in the Viewer
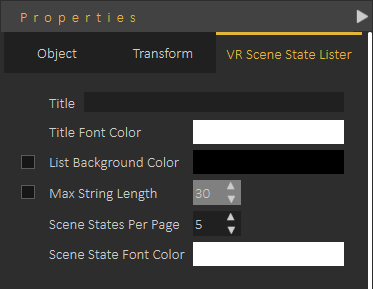
#### Create Scene States Lister
Scene State Lister automates the processes of showing the **Scene States** in the scenes and allows the user to switch between them during the VR Experience.
Adding a Scene State Lister will add it to the 3D area, and the Scene Browser. The user can control **Scene State Lister** parameters from VR Scene State Lister tab in the **Properties Panel**, as shown in the following image.
[](https://simlab-soft.com/help/uploads/images/gallery/2021-12/image-1640859822645.png)
The following tutorial shows how to use **Scene State Lister** in a VR Experience: