# Running VR Experiences
[](https://simlab-soft.com/help/uploads/images/gallery/2022-01/selectmodel-panel.jpg)
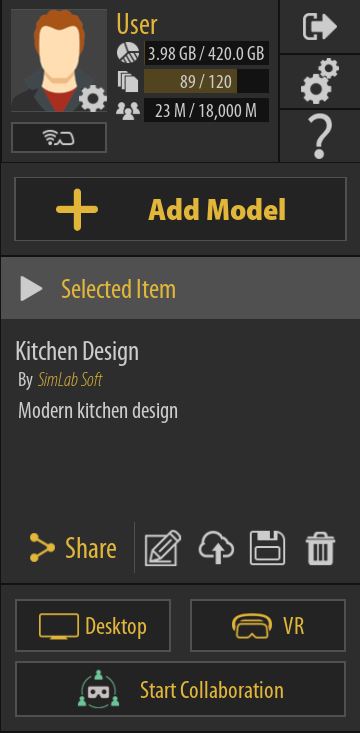
Once a VR Experience has been selected, its name and description along with the name of the person who shared it with you will be displayed in the **Selected Item Panel** to the right, additionally, you will find 2 buttons to run the Experience in **Desktop Mode** or **VR Mode**.
#####
#####
##### Desktop Mode
If you are using a **Windows** or **macOS** computer and you do not have a VR headset, you can Run VR Experiences in Desktop Mode where you will be using the mouse and keyboard to navigate the scene and interact with objects.
##### VR Mode
With VR Mode you can run the VR experience using PC VR headsets which are VR headsets that are attached with a cable to a computer.
Supported VR devices are :
[](https://simlab-soft.com/help/uploads/images/gallery/2022-01/vive.png)
**HTC Vive** / **HTC Vive Pro**
[](https://simlab-soft.com/help/uploads/images/gallery/2022-01/oculus.png)
**Meta Quest 2** / **Meta Quest 3** /**Oculus Rift** / **Oculus Rift S**
[](https://simlab-soft.com/help/uploads/images/gallery/2022-01/pico.png)
**Pico Neo 3** / **Pico Neo 4**
[](https://simlab-soft.com/help/uploads/images/gallery/2022-01/mixed-reality.png)
**Windows Mixed Reality**
#####
[](https://simlab-soft.com/help/uploads/images/gallery/2022-01/mixed-reality.png)
**HP Reverb**
##### Pairing Wireless Devices
If you are using a standalone VR Headset such as Oculus Go and Oculus Quest in wireless mode or a mobile device, you can use pairing to login to your account and gain access your uploaded models.
Before you pair your wireless device you need to first install the SimLab VR Viewer on those devices, **[click here](https://simlab-soft.com/technologies/simlab-showroom.aspx)** to download the VR Viewer for wireless devices.
Once you have installed SimLab VR Viewer on wireless devices, follow these steps :
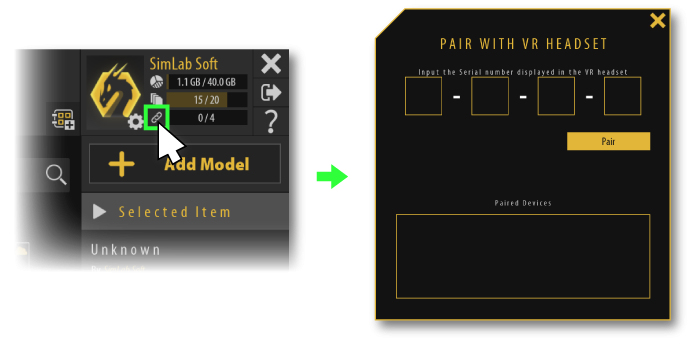
1. Run the VR Viewer on you computer first and from the top right corner click the **Pairing button**.
[](https://simlab-soft.com/help/uploads/images/gallery/2022-01/pair1.png)
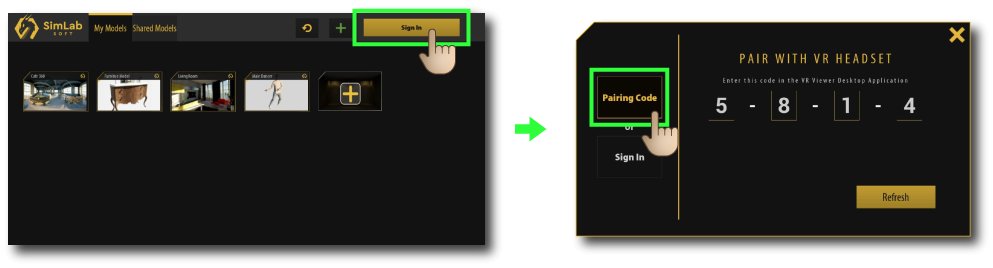
2\. Run SimLab VR Viewer on the wireless device and click on **Sign in** at the top Right corner
[](https://simlab-soft.com/help/uploads/images/gallery/2022-01/pair2.png)
3\. Insert the pairing code that shows on your device into your PC.
[](https://simlab-soft.com/help/uploads/images/gallery/2022-01/pair3.png)
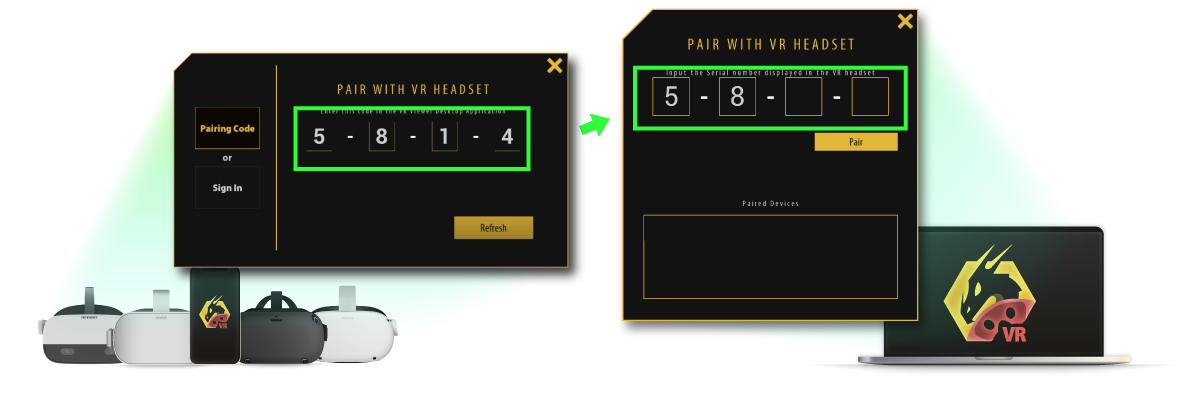
4\. Click **pair**, then the device should appear on the pairing devices list, you can rename it or delete it from this list as well.
[](https://simlab-soft.com/help/uploads/images/gallery/2022-01/pair4.png)
5\. **click the Refresh button** on your device, then all of the shared models will be displayed.
[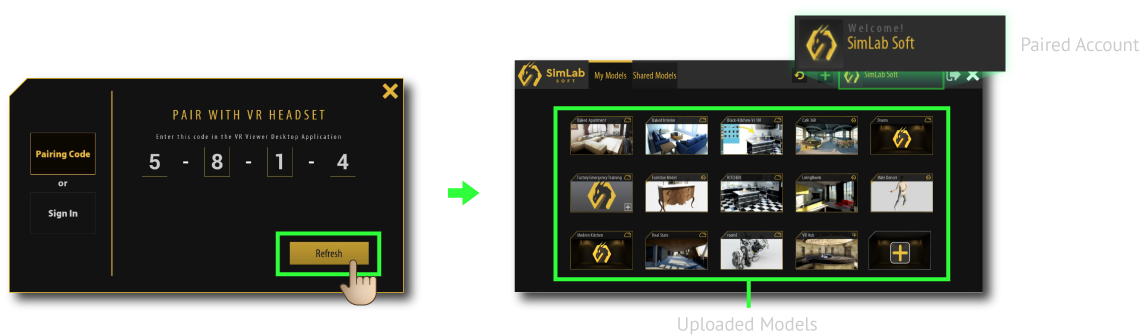](https://simlab-soft.com/help/uploads/images/gallery/2022-01/pair5.png)
6\. Select the desired model to run it on the wireless device.
##### Collaboration Mode:
There is a complete page made for collaboration through [**this link**](https://simlab-soft.com/help/books/vr-collaboration), but we will give a brief explanation here.
Whether you want to run the experience in desktop mode or VR mode, you can start a collaboration lobby if you want to invite others to join you in the same run.
To start a collaboration lobby press the **Start Collaboration** button highlighted in the image below
[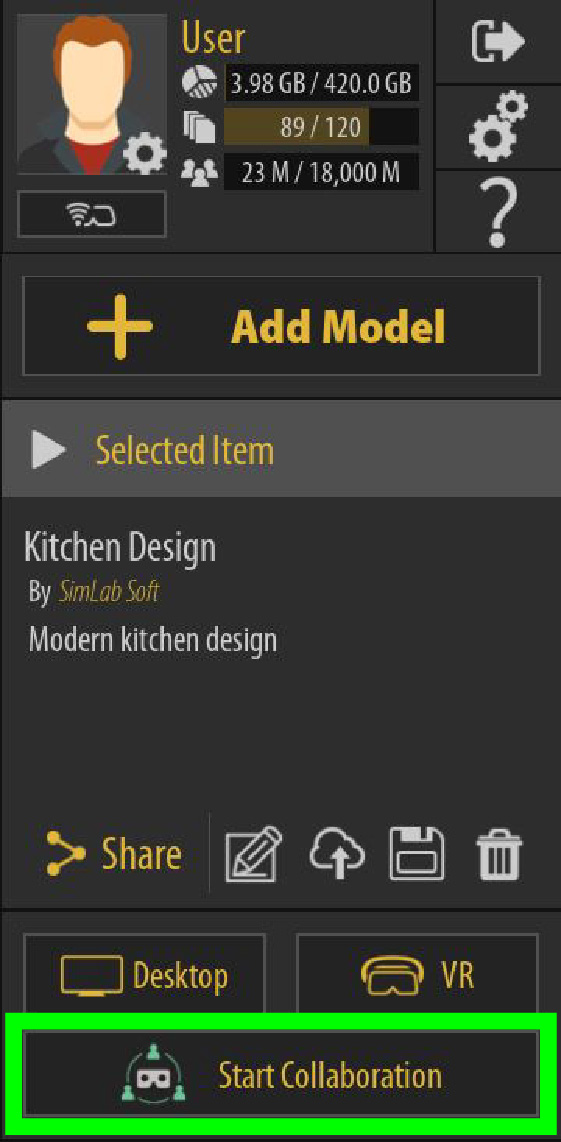](https://simlab-soft.com/help/uploads/images/gallery/2025-02/running-vr-collaboration.jpg)
This will create a lobby from which you can do a variety of actions, the most important one being **inviting others,** which can be done in two ways:
1- You can invite others by adding contacts you have in your **Contacts** list (refer to **[this page](https://simlab-soft.com/help/books/simlab-vr-viewer-for-creators/page/contacts-and-sharing)** to learn about contacts), the button to add contacts is highlighted in the image below
2- The second method is sending an **Invitation Link,** which you can send to other users to directly join you through, this is highlighted and labeled in the image below
[](https://simlab-soft.com/help/uploads/images/gallery/2025-02/collaboration-lobby-invites.jpg)
Picking the platform in which you want to start the collaboration run with is also done from inside this dialog, using the **Desktop** and **VR** buttons seen in the image, and once loading the scene is over and everyone is in the lobby and are also done with loading, you can click the **Start** button to run the scene.
Other important options and elements in this dialog are highlighted and labeled in the image below
[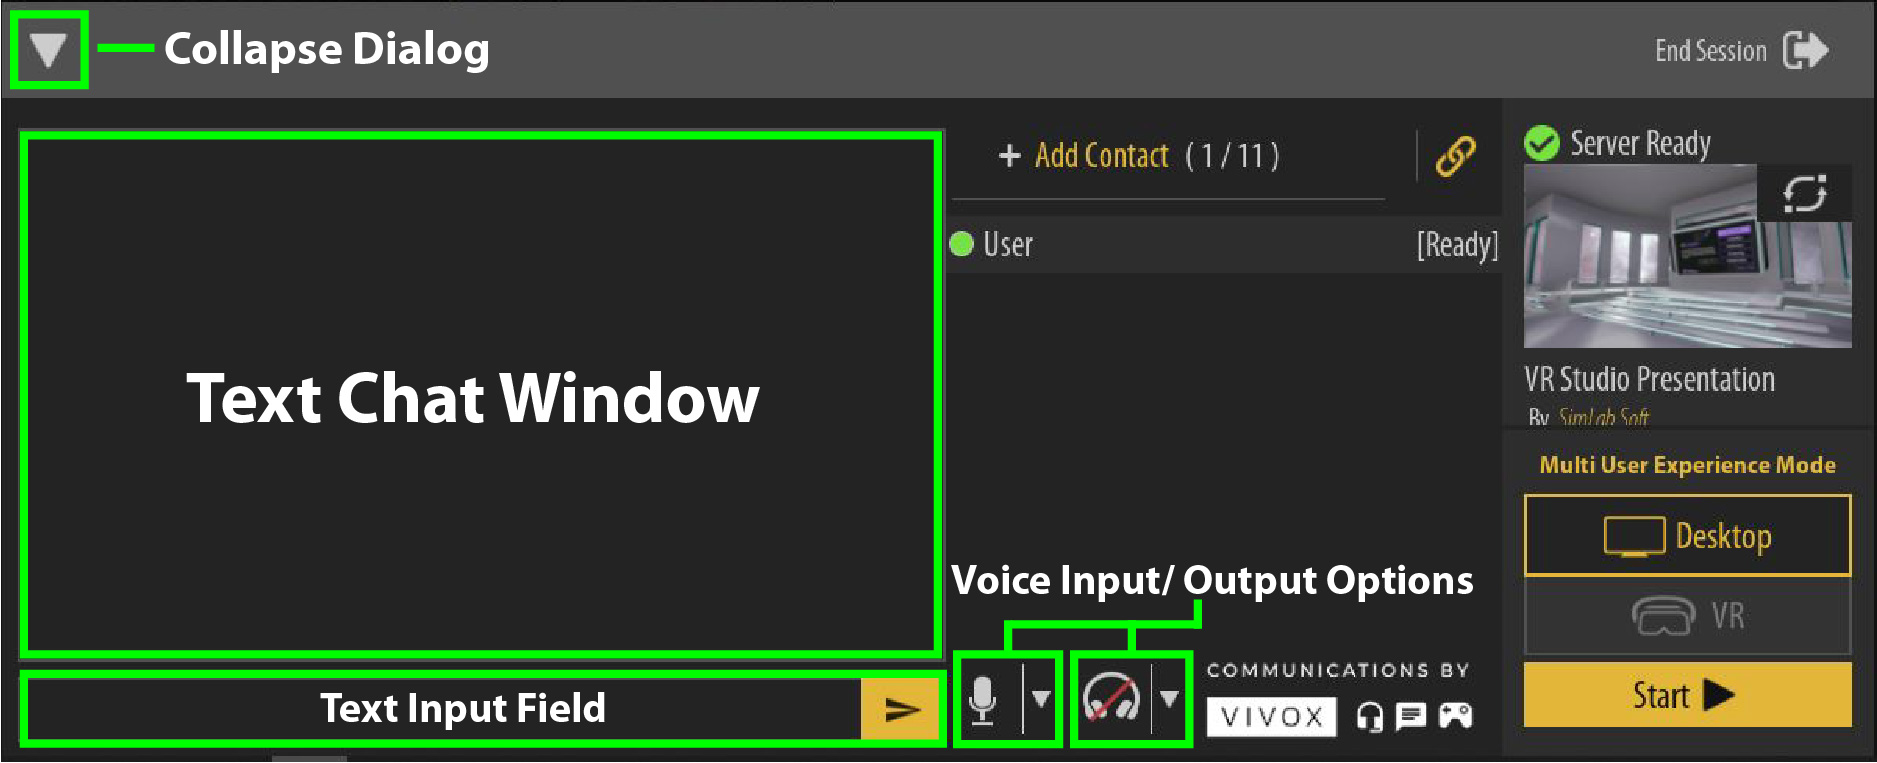](https://simlab-soft.com/help/uploads/images/gallery/2025-02/collaboration-options.jpg)