Joining a Scheduled VR Collaboration Session (Meta Quest)
Learn how download and install Simlab VR Viewer on your device, as well as joining a schedules VR Session through contact invitation or using an invitation link.
Installing SimLab VR Viewer
 |
This chapter guides you through installing the SimLab VR Viewer on your Meta Quest Device. SimLab VR Viewer is a free, essential cross-platform application required to run, view, and participate in VR experiences, including collaboration sessions and viewing shared SimLab VR packages (.vrpackage files). |
The SimLab VR Viewer can be installed onto your Meta Quest headset using any of the four convenient methods below. Using the mobile app or web browser is often the easiest way, as the app will download to your headset wirelessly while it's in standby mode.
Method 1 : Via Headset (installation Device : Meta Quest Device)
- Put on your headset and open the Store.
- Search for "SimLab VR Viewer" and select the app.
- Click Download or Install.
Method 2 : Via Mobile App (installation Device : Meta Horizon Mobile App)
- Open the Meta Horizon mobile app on your phone/tablet and ensure your headset is connected.
- Tap the Store icon (usually a shopping bag).
- Search for "SimLab VR Viewer".
- Select the app and tap Download or Get. The app will be remotely installed on your headset.
Method 3 : Via Website (installation Device : Meta Quest Web Store)
- Go to the official Meta Quest Store webpage (or click the link below).
- Ensure you are signed into your Meta account.
- Navigate to the SimLab VR Viewer page.
- Click the Get button. The app will be remotely installed on your headset.
Application Link
SimLab VR Viewer on Meta Quest Store
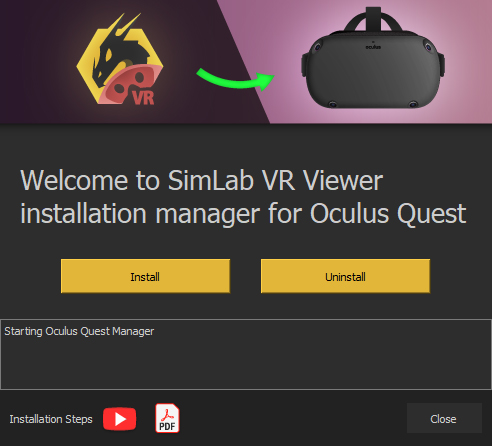
Method 4 :
Via Installation Manager (PC/Mac & Cable)
-
Request Access: Go to the official SimLab Meta Quest VR page.
-
Get Installer: Click the "Get it Now" button, fill in your information (Name, Email, Industry), and you will be directed to the download page. Download the SimLab VR Viewer Installation Manager for Quest VR for your operating system (Windows or macOS).
-
Unlock Developer features on your Oculus Account (If you already have a developer account, skip this step):
- Go to https://dashboard.oculus.com/organizations/create/ and make sure you are logged in to your Oculus account.
- Put any name you want then complete the submission.
- On your mobile device, run the Oculus app, select the Oculus Quest device and go to developer options, then turn on developer mode.
-
Connect Headset: Connect your Quest headset to the PC or Mac using a USB-C cable.
-
Allow Debugging: Put on the headset, wait for the confirmation message, and Allow the USB Debugging prompt to establish a connection.
-
Install App: Run the downloaded Installation Manager on your computer. Click the (Install) button within the manager to sideload the VR Viewer application onto your Quest VR device.
-
Locate App: After installation is complete, find and launch the app on your Quest VR headset by navigating to the appropriate section for sideloaded or unknown sources applications (typically found in Library > Unknown resources > SimLab VR Viewer).
Joining as a contact
This is the simplest way to join. If the host/administrator has already added your email to their SimLab Contacts list, you don't need a link.
Prerequisites:
-
The host must have added your email to their SimLab Contacts list.
-
You must be Signed In to the SimLab VR Viewer app on your Quest headset.
Joining via In-App Notification
Because you are an invited contact, the SimLab VR Viewer will handle the invitation entirely inside your headset.
Action (In-App Join):
-
Notification Prompts: When you are inside the SimLab VR Viewer, you may see timed messages leading up to the scheduled start time.
-
Host Initiates Session: When the host clicks Start Collaboration, you will receive the final launch prompt directly inside your headset.
-
Message: "[Host Name] has invited you to join a Collaborative VR Experience session."
-
-
Click the 'Join' Button: Use your Quest controller to click the Join button within the notification window to immediately launch and enter the collaborative VR session Lobby.

Joining using a Link invitation (Guest/Ad-Hoc)
This method is for when the host only sends you a direct link. Since the Quest browser doesn't easily handle direct link launching, you must first register the link using a helper device or manually enter the URL.
Prerequisites:
-
The host sends you the invitation link via email or chat.
-
You must access the link on a PC or mobile device (Method A) or manually type it in VR (Method B).
Method A: Registering the Link to Your Account (Recommended)
Use a PC or mobile device to register the link, which converts the invitation into a registered session, allowing the Quest to treat you as an invited contact.
Action (on PC/Mobile Device):
-
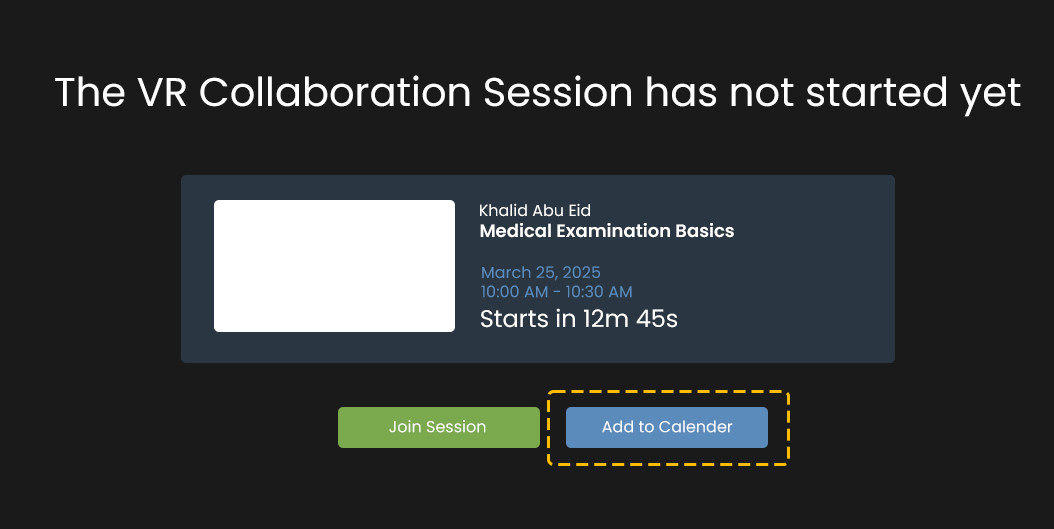
Click the Invitation Link provided by the host on your PC or Mobile Device.
-
On the web page that opens, click the Add to Calendar or Add Link button.
-
Log In: If prompted, log into your SimLab account.
-
The session is now registered in the Invitations tab on the SimLab Dashboard.
Joining the Session (in Quest Headset):
-
Put on your Quest Headset and launch the SimLab VR Viewer while logged into the same account.
-
Because the session is registered to your account, when the host starts the session, you will receive the in-app notification (as described on Page 2).
-
Click Join to enter the Lobby.
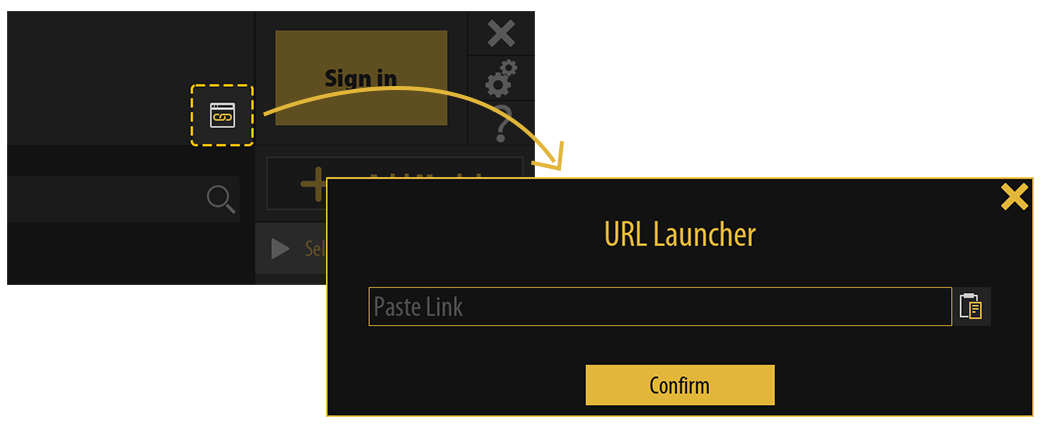
Method B: Joining via the URL Launcher (Manual Input)
This method lets you bypass the web registration by entering the link directly in the VR Viewer.
Action (in Quest Headset):
-
Launch the SimLab VR Viewer application.
-
Locate and click the URL Launcher button (often a small icon or button).
-
Use the VR keyboard to type or paste the Invitation Link into the dialogue window.
-
Click Confirm.
Result:
-
You will be taken to the Lobby screen where the VR experience will load, and you can join the session. If you were not already signed in, you may be prompted to Login or Continue as a Guest.