Events
- AI Agent
- SceneNode \ Dynamic Menu
- SceneNode \ Query
- Scene Node \ Overlap
- SceneNode \ Triggered
- Controller
- Keyboard
- User
- Variable
- On Message Received
- Voice Command
- Execution
- Snapping
- SceneNode \ Attributes
- SceneNode \ Assembly
- SceneState
- SceneNode \ Grab
- SceneNode \ Hover
- Sequence
- Boolean
AI Agent
 AI Agent Start Talk
 The AI Agent Start Talk node activates the exact moment an assigned AI Agent begins delivering its response.
 AI Agent End Talk
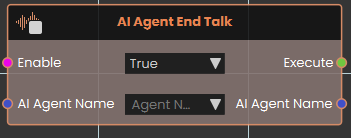
The AI Agent End Talk node activates as soon as the assigned AI Agent finishes delivering its response.
For more information, please watch the AI Start/End talk tutorial:
SceneNode \ Dynamic Menu
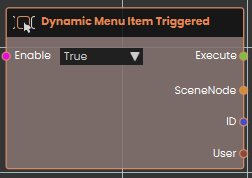
 Dynamic Menu Item Triggered
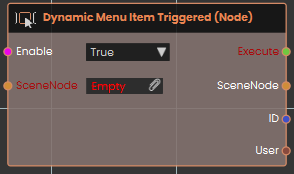
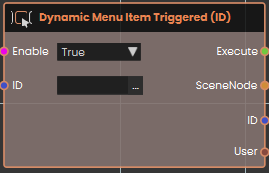
Dynamic Menu Item Triggered(ID)
Dynamic Menu Item Triggered(Node + ID)

Example:
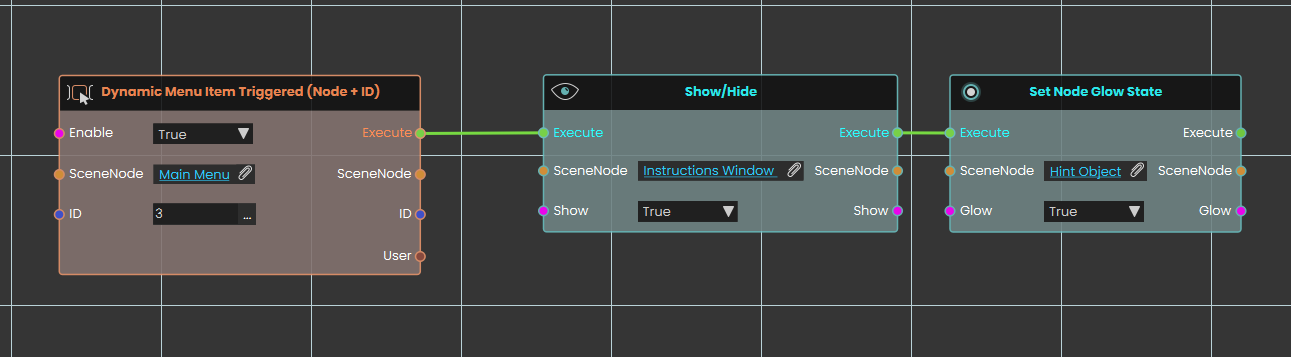
In this example, the Dynamic Menu Item Triggered (Node + ID) node is configured to act as a "Help" button. By setting the SceneNode to "Main Menu" and the ID to "3", the system listens exclusively for that exact button press on that specific menu object. Once the user clicks this button, the execution flow passes to a Show/Hide node configured to display an "Instructions Window" by setting its state to True. Immediately following this, the flow triggers a Set Node Glow State node, which applies a visual highlight to a designated "Hint Object" to guide the user.
Dynamic Menu Item Triggered(Node)
SceneNode \ Query
 Node Added to Query
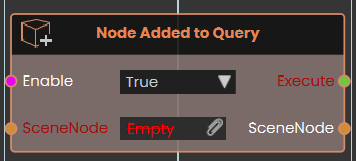
The Node Added to Query event node constantly monitors the scene and triggers its Execute output whenever a 3D object's attributes are modified to match the specific conditions defined by a connected Scene Node Query. By plugging a query into the node's SceneNode input, it listens for any object that newly meets these criteria—essentially being "added" to the query's list of valid results—and subsequently passes both the execution signal and the specific SceneNode that triggered the event through their respective outputs, allowing for dynamic, attribute-driven logic without needing to manually target individual objects.
Example:

In this example, a Scene Node Query is configured to continuously look for any object that has an attribute named "Parts" with a value containing "Part_". This query is connected directly to Node Added to Query event node. During the experience, whenever an object has its attributes updated to successfully meet this exact condition, the event node automatically triggers and passes that specific object through its SceneNode output into a Set Node Glow State node.
 Node Removed From Query
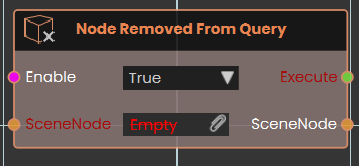
The Node Removed From Query event node continuously monitors the scene and triggers its Execute output whenever a 3D object's attributes change so that they no longer match the conditions of a connected Scene Node Query. By connecting a query to the node's SceneNode input, it watches for any object that falls out of the query's criteria—essentially being "removed" from the list of valid results.
Example:

In this example, a Scene Node Query is configured to track any object that has an attribute named "Bullet_Instance". This query is connected directly to the SceneNode input of the Node Removed From Query event node. During the experience, if an object's attributes are altered so it no longer possesses the "Bullet_Instance" attribute (for example, if the attribute is removed after a collision), the event node automatically triggers and passes that specific object through its SceneNode output into a Delete SceneNode node.
Scene Node \ Overlap
 Node Entered Node

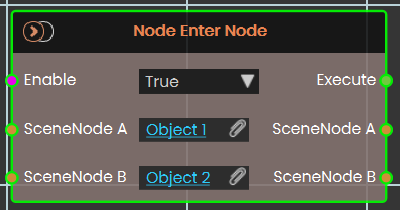
The Node Enter Node event is triggered when Scene Node A enters Scene Node B. Both nodes can be any nodes in the assembly tree — for example, Node A could be a screwdriver and Node B could be a screw.
 Node Exited Node

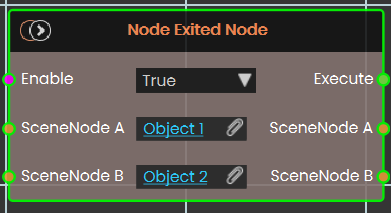
The Node Excited Node event is triggered when Scene Node A exits Scene Node B. Both nodes can be any nodes in the assembly tree — for example, Node A could be a screwdriver and Node B could be a screw.
SceneNode \ Triggered
 Node Triggered

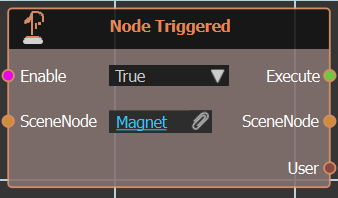 Node Triggered event is executed when the selected Scene Node is triggered within VR environment.
 Node Triggered Location
 The Node Triggered Location is used to capture the specific location or position of a triggered event within the VR environment. It enables tracking where a particular interaction occurred, which can be useful for dynamic object placement, analytics, or event-triggered responses based on spatial coordinates.
Example

In this example, the Node Triggered Location is used to capture the location where the user triggers the target. When the target is hit, the node records the exact spot, and a bullet hole is placed using the Set Node Location. The Make Node Copy is used to enable the user to shoot more than one bullet, creating a new bullet hole at each triggered location. This setup allows for repeated interactions, with each shot creating a new bullet hole in the correct spot.
Controller
 Grip Pressed

The Grip Pressed node enables the user to detect when the VR controller's grip is pressed. By connecting a response to this node, the specified action is executed each time the grip is pressed, allowing for interactive controls within the VR Experience.
Example

In this example, a Grip Pressed node is used to execute a response. Once the Grip press is triggered, the Grip Pressed node checks the boolean value. If the condition is met, the connected response executes, and the animation plays during the VR Experience.
 Grip Released

The Grip Released node enables the user to detect when the VR controller's grip is released. By connecting a response to this node, the specified action is executed each time the grip is released, allowing for interactive controls within the VR Experience.
Example

In this example, a Grip Released node is used to execute a response. Once the Grip released is triggered, the Grip Released node checks the boolean value. If the condition is met, the connected response executes, and the animation plays during the VR Experience.
 Hand
Hand

Keyboard
On Key Pressed
Right click in the Dynamic Training Builder and type in the
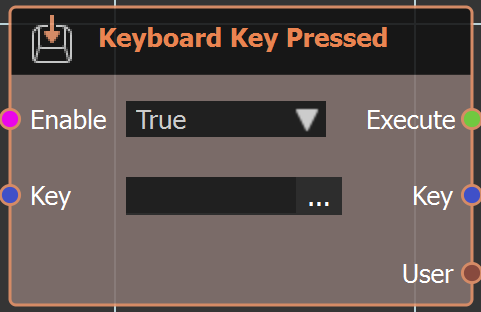
"Keyboard" or look under "Events" to get this node. As the name implies when a keyboard key is pressed this event is triggered.
Example
On Key Released
Same as above node but when key is released.
Check this tutorial to learn more about these events.
User
 User Entered Node
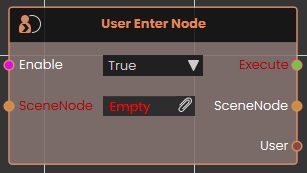
The User Enter Node event node continuously monitors the physical boundaries of a specific 3D object and activates the moment a user's avatar collides with or enters its volume. While enabled, it passes forward a reference to the specific User involved before continuing the logic flow. This functionality applies to all participants within multiplayer VR collaboration scenes.
 User Exited Node
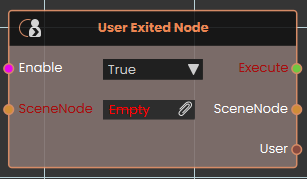
The User Exited Node event node tracks the physical boundaries of a specific 3D object and activates the exact moment a user's avatar stops colliding with or fully exits its volume. While enabled, the node watches the targeted SceneNode and triggers its output as soon as the user completely separates from the object, passing forward a reference to the specific User who left before continuing the execution logic. And like User Enter Node, it also applies to all participants within multiplayer VR collaboration scenes.
User Joined
Runs part of your scene whenever someone new joins your shared collaborative session.
What it does
When several people share the same VR/3D session, this node watches for new arrivals. Each time another person joins, the node fires on its own — you don’t need to trigger it from anywhere. It also hands you the person who just joined, so you can greet them, show them a welcome message, or update a list of who’s present.
The node only reacts to people joining; it doesn’t change anything about the session or the new arrival on its own. Whatever happens next is up to the steps you wire after it.
Inputs
| Port | Type | What to connect |
|---|---|---|
| Enable | True / false | While this is true the event is active and will react to people joining. Set it to false to switch the event off — for example, once your scene has finished its opening sequence. Leave it true to keep listening. |
Outputs
| Port | Type | What you get |
|---|---|---|
| Execute | Trigger | Fires each time someone new joins the session. Wire this to whatever you want to happen on a new arrival. |
| User | User | The person who just joined. Use this to greet them by name, give them a starting position, or add them to your list of participants. |
Example
| Enable input | true — keep listening for new arrivals throughout the session |
| Execute output | Fires when a new person joins; wire it to a step that shows a “Welcome!” pop-up |
| User output | The person who joined — for example <alice> |
Tips
- This node fires once per person each time someone joins. If three people join, it runs three separate times — once for each, with that person on the User output.
- Pair it with the matching “User Left” event to keep an up-to-date list of who is currently in the session.
QR Detected
Reacts the moment a QR code is spotted by the camera, and hands you the text stored inside it.
What it does
This node watches for QR codes in the scene’s view. As soon as one is detected, the node fires on its own — you don’t need to trigger it from another node. It then gives you the text that was encoded in the QR code, so you can react to it however you like (open a door, show a message, jump to another part of your training, and so on).
It keeps listening as long as it is switched on, firing again each time a QR code is read. It only reports what the code contains — it doesn’t change anything by itself.
Inputs
| Port | Type | What to connect |
|---|---|---|
| Enable | True / false | Switches the event on or off. While this is true the node is actively watching for QR codes; set it to false to turn the event off so it stops reacting. |
Outputs
| Port | Type | What you get |
|---|---|---|
| Execute | Trigger | Fires each time a QR code is detected. Wire this to whatever should happen next. |
| Message | Text | The text that was stored inside the detected QR code — for example a web address, a part number, or a station name. |
Example
| Enable input | true |
| Message output | Station-04 |
Tips
- Connect the Message text to a node that compares it against the codes you expect, so different QR codes can lead to different actions.
- Set Enable to
falseonce you no longer need to scan, so the node stops reacting to stray codes in view.
The User Exited Node event node tracks the physical boundaries of a specific 3D object and activates the exact moment a user's avatar stops colliding with or fully exits its volume. While enabled, the node watches the targeted SceneNode and triggers its output as soon as the user completely separates from the object, passing forward a reference to the specific User who left before continuing the execution logic. And like User Enter Node, it also applies to all participants within multiplayer VR collaboration scenes.
Variable
 Variable Changed
 The Variable Changed event activates when the value of a specified variable is modified. This event helps users detect real-time changes and trigger actions accordingly, enabling dynamic and responsive interactions within the VR Experience.
Example
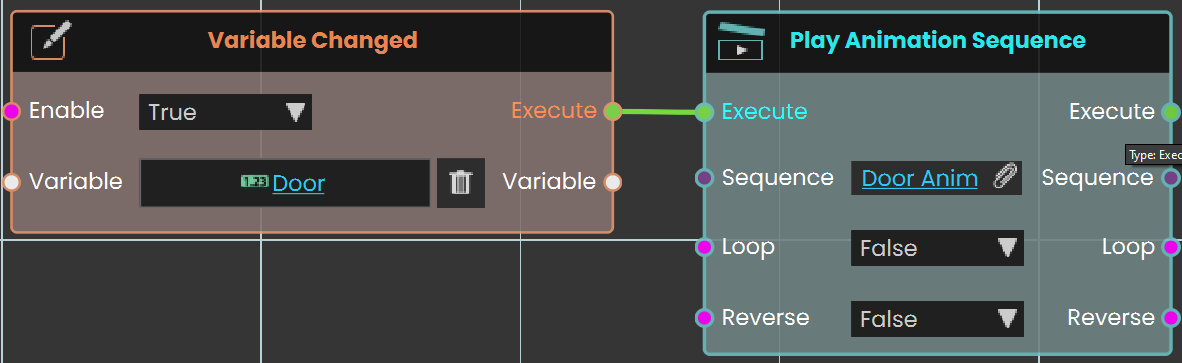
In this example, the Variable Changed event is set to monitor changes in the variable Door. When the value of this variable is modified, the event triggers the Play Animation Sequence node, which activates the Door Anim animation sequence.
On Message Received
SimLab Composer 14 introduces WebSocket support, enabling seamless integration with external systems, allowing it to work with external hardware, co-simulation engines, and websites, unlocking numerous possibilities.
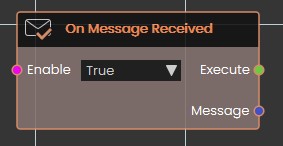
Use the node On Message Received to trigger an event when a message is received.
The On Message Received node triggers an event when an unhandled message is received from the external connection. This node allows you to access the incoming message and take appropriate action based on its content. It is useful for responding to external data or commands and processing messages within the VR Experience.
Input Ports:
- Enable
Output Ports:
- Execute
- Message
The WebSocket nodes (Open External Connection, Send Message, and Receive Message) are exclusively available in the Ultimate Edition.
Voice Command
 Voice Command Recognized

The Voice Command Recognized event is used to activate a response when the user says a specific command. This event listens for predefined voice commands and triggers the associated actions or responses within the VR environment upon recognizing the command.
Example

In this example, a new voice command named "Door Open" is created by accessing the Voice Command section from the Interaction menu and adding the command in the Voice Commands window.

The Voice Command Recognized event is used to link the newly created "Door Open" command. When the user says "Open the door", the door open sequence is triggered and plays.
Voice Command Test
Listens for a spoken voice command and reacts when someone in your scene says one.
What it does
This node waits and listens. Whenever a person in your VR scene speaks a voice command out loud, the node fires on its own — you don’t need anything to trigger it. Each time it fires, it tells you the exact words that were spoken and which user said them, so you can respond to what they asked for.
The node stays active only while its Enable input is true. Set Enable to false whenever you want to stop listening for voice commands.
Inputs
| Port | Type | What to connect |
|---|---|---|
| Enable | True / false | While this is true the node is listening for voice commands; set it to false to switch the listening off. Leave it true to keep responding to spoken commands. |
Outputs
| Port | Type | What you get |
|---|---|---|
| Execute | Trigger | Fires each time a voice command is spoken. Wire this to whatever should happen in response. |
| Command | Text | The words that were spoken, as text. Use this to decide how to react to what was said. |
| User | User | The person who spoke the command, so you can respond to that specific user. |
Example
| Enable input | true |
| Command output | open the door |
| User output | The trainee who spoke the command |
Tips
- Connect the Command output to a node that compares text, so you can run different actions for different spoken phrases.
- If you want voice commands active only during a certain part of your scene, wire a true/false value into Enable and switch it off when that part is over.
Execution
 Custom Event

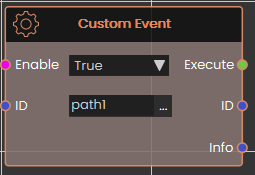
This event is activated manually by the user. It's useful when you want multiple different paths or actions to lead to the same response.
To set it up, use the Trigger Custom Event response and assign it a unique ID (e.g., path1). You can place this trigger in as many locations as needed.
Whenever a Trigger Custom Event is called, it will execute the Custom Event that has a matching ID.
If you want to pass additional info, you can use the info field in Trigger Custom Event response, this data will be passed to the even in the info port
 Scene Start

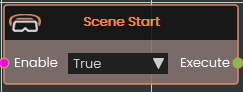
This event is triggered automatically when the scene begins. Use it to initialize elements at startup, such as playing videos, running background animations, or any other setup tasks.
Note: Since this event fires the moment the scene loads, it's recommended to add a small delay before making additional scene changes — this ensures all scene elements have fully initialized before anything else runs.
 Ticker
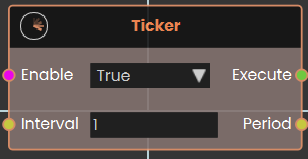
The Ticker event node functions as a continuous, time-based loop that repeatedly activates subsequent nodes at a consistent rate. As long as its Enable input is set to True, the node constantly triggers its Execute output every time the duration specified in the numerical Interval input (measured in seconds) elapses. Once activated, it continually outputs this time value through the Period pin, allowing the logic flow to perform recurring actions or background checks for as long as the node remains enabled.
Example:
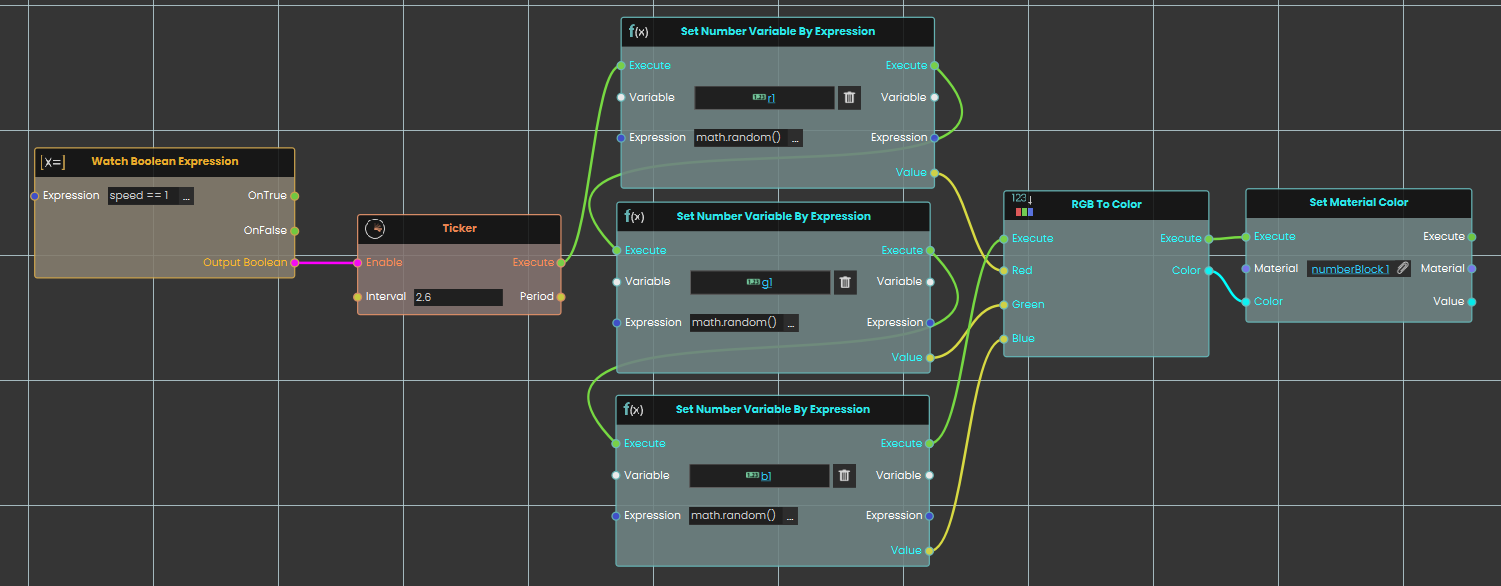
In this example, we use the Ticker node to create a loop that randomly changes a material's color every 2.5 seconds:
-
A Watch Boolean Expression node continuously monitors the "speed1" variable and activates the Ticker node once the value equals 1.
-
While enabled, the Ticker node creates a continuous loop that triggers its execution output every 2.5 seconds.
-
The Ticker simultaneously executes three Set Number Variable By Expression nodes to generate random values using the
math.random()function for the variables r1, g1, and b1. -
These three random numbers are passed into an RGB To Color node, where they are combined to formulate a new color.
-
Finally, this new color is sent to a Set Material Color node, which immediately applies the randomly generated color to the target material.
 Error
Error

Fires whenever an error happens while your experience is running, and hands you a message describing what went wrong.
What it does
This node is a safety net. Unlike most nodes, you do not trigger it from an earlier node — it listens on its own in the background while your experience runs. If an error occurs, its Execute output fires and its Error Message output gives you the text of that error. Instead of letting a problem pass unnoticed, you can respond to it — show the user a clear message, make a note of what happened, or move things to a safe state.
Turning it on and off
The Enable input controls whether the event is listening. It is on by default, so the node starts catching errors as soon as your experience begins. If you only want to catch errors during a certain part of your experience, connect a Yes/No value to Enable and switch it on and off as needed; while it is off, the event stays quiet and its Execute output will not fire.
Inputs
| Port | Type | What to connect |
|---|---|---|
| Enable | True / false | Optional. Whether the event is listening for errors. On by default — leave it on to catch errors the whole time, or connect a Yes/No value to switch it on and off. |
Outputs
| Port | Type | What you get |
|---|---|---|
| Execute | Trigger | Fires the moment an error occurs while the event is enabled. Wire it to whatever should happen in response. |
| Error Message | Text | A short description of the error that occurred. |
Example
| Enable input | On (the default) |
| Execute output | Fires when an error happens |
| Error Message output | Could not load the requested file. — the exact wording depends on what went wrong |
Tips
- Respond to the problem. Wire Execute to something that handles it — show the user the Error Message, make a note of it, or move the scene to a safe state — rather than letting the error pass silently.
- Show the message. The Error Message output is plain text, so you can display it on a panel or pass it into another node.
- Limit when it listens. Leave Enable on to watch the whole time, or turn it off during parts of your experience where you would rather handle problems yourself.
Snapping
 Node Ready To Snap
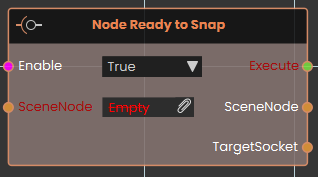
The Node Ready to Snap event node activates the exact moment a designated SceneNode enters the valid snapping range of an eligible target. This node is highly useful for triggering immediate visual or audio feedback—such as highlighting a destination socket green or playing a hovering sound—letting the user know the object is ready to be released and snapped.
 Node Snapped
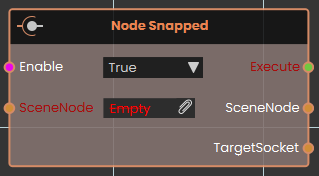
The Node Snapped event node activates immediately after a SceneNode has successfully completed its snapping action onto a target socket. This event is typically used to seamlessly progress a sequence, such as locking the snapped part in place, playing a mechanical click sound, or advancing the user to the next step of an assembly training scenario.
SceneNode \ Attributes
These event nodes watch an object and fire automatically the moment one of its attributes changes — so you can react when an attribute is added, edited, or removed without having to keep checking for it yourself. They pair naturally with the Set Node Attribute and Remove Node Attribute nodes, which are what usually make these events fire.
Each event watches the object you connect to its SceneNode input. When it fires, it hands you the object that changed along with the Category and Name of the attribute involved, so you know exactly what happened. Leave the Enable input on to keep watching, or turn it off to pause.
 Node Attribute Added
Fires automatically the moment a brand-new attribute is added to an object.
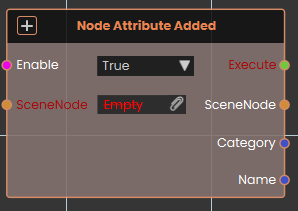
What it does
The Node Attribute Added event node continuously monitors the targeted SceneNode and activates whenever a completely new attribute is attached to it. This event is typically used in conjunction with Set Node Attribute nodes to trigger subsequent actions. Once activated, it outputs the affected SceneNode along with the specific Category and Name of the newly created attribute.
Inputs
| Port | Type | What to connect |
|---|---|---|
| Enable | True / false | Turns the watch on or off. It is on by default; set it to false to pause watching and back to true to resume. |
| SceneNode | Scene node | The object you want to watch. |
Outputs
| Port | Type | What you get |
|---|---|---|
| Execute | Trigger | Fires each time a new attribute is added to the object. Wire the next node here to react — this is what starts the chain. |
| SceneNode | Scene node | The object the change happened on. |
| Category | Text | The category the affected attribute belongs to. |
| Name | Text | The name of the affected attribute. |
Example
| SceneNode input | the <Forklift> object |
| Execute output | fires when an attribute is added to the forklift |
| SceneNode output | the <Forklift> object |
| Category output | Maintenance |
| Name output | inspected |
 Node Attribute Changed
Fires automatically whenever the value of one of an object’s attributes changes.
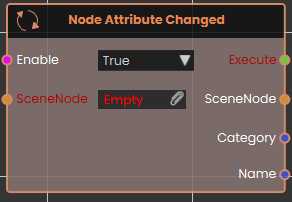
What it does
The Node Attribute Changed event node observes the targeted SceneNode and activates whenever the value of any of its existing attributes is modified. Once activated, the node outputs the affected SceneNode alongside the exact Category and Name of the altered attribute.
Inputs
| Port | Type | What to connect |
|---|---|---|
| Enable | True / false | Turns the watch on or off. It is on by default; set it to false to pause watching and back to true to resume. |
| SceneNode | Scene node | The object you want to watch. |
Outputs
| Port | Type | What you get |
|---|---|---|
| Execute | Trigger | Fires each time one of the object’s attributes changes value. Wire the next node here to react — this is what starts the chain. |
| SceneNode | Scene node | The object the change happened on. |
| Category | Text | The category the affected attribute belongs to. |
| Name | Text | The name of the affected attribute. |
Example
| SceneNode input | the <Forklift> object |
| Execute output | fires when one of the forklift’s attributes changes value |
| SceneNode output | the <Forklift> object |
| Category output | Maintenance |
| Name output | inspected |
 Node Attribute Removed
Fires automatically the moment an attribute is removed from an object.
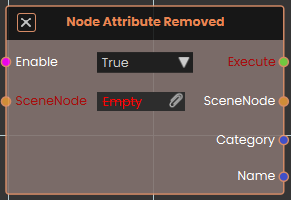
What it does
The Node Attribute Removed event node tracks the targeted SceneNode and activates the moment an existing attribute is deleted from the object. This event is typically used alongside the Remove Node Attribute node to initiate reactions to data clearance. Once activated, it outputs the affected SceneNode forward along with the specific Category and Name of the deleted attribute.
Inputs
| Port | Type | What to connect |
|---|---|---|
| Enable | True / false | Turns the watch on or off. It is on by default; set it to false to pause watching and back to true to resume. |
| SceneNode | Scene node | The object you want to watch. |
Outputs
| Port | Type | What you get |
|---|---|---|
| Execute | Trigger | Fires each time an attribute is removed from the object. Wire the next node here to react — this is what starts the chain. |
| SceneNode | Scene node | The object the change happened on. |
| Category | Text | The category the affected attribute belongs to. |
| Name | Text | The name of the affected attribute. |
Example
| SceneNode input | the <Forklift> object |
| Execute output | fires when an attribute is removed from the forklift |
| SceneNode output | the <Forklift> object |
| Category output | Maintenance |
| Name output | tempNote |
SceneNode \ Assembly
These are event nodes for SimLab’s VR assembly system. Each one watches a single part and fires the moment something happens to that part in the assembly — for example the moment it becomes fully assembled, or the moment it becomes this part’s turn to be put on. You wire the event’s output to whatever should happen in response.
Unlike an action you run in a sequence, an event runs on its own — it has no Execute input. Every node on this page works the same way:
- Enable (true/false) switches the event on or off. It is on by default; set it to
falseto stop the event from firing. - SceneNode (input) is the part to watch.
- Execute (output) fires once each time the event happens — wire it to what should happen next.
- SceneNode (output) hands the same part back, so you can act on it in your response.
In a VR assembly, parts go together and come apart in a set order, and a part can be fully assembled (in place and secured), partially assembled (seated but not yet secured), or fully disassembled (all the way out). These events let your scene react the instant a part reaches one of those points, or the instant it becomes — or stops being — the part that may be added or removed next.
To read or set a part’s assembly state on demand instead of reacting to it, see the SceneNode \ Assembly page; to continuously check a part’s state as a true/false condition, see the Assembly page.
What’s on this page
- Node Assembled — fires when a part becomes fully assembled.
- Node Disassembled — fires when a part becomes fully disassembled.
- Node Can be Assembled — fires when it becomes this part’s turn to be put on.
- Node Can Not be Assembled — fires when the part is no longer the one allowed to be put on next.
- Node Can be Disassembled — fires when it becomes this part’s turn to be taken off.
- Node Can Not be Disassembled — fires when the part is no longer the one allowed to be taken off next.
When a part is fully assembled or fully taken apart
Node Assembled
Fires the moment a part finishes being fully assembled into its place in an assembly.
What it does
This event keeps an eye on one part of your assembly. As soon as that part is put fully into place — seated and secured in its spot — the event fires on its own. It does not run as a step in a sequence; it simply watches and waits, then reacts.
When it fires, it hands the same part straight back out so you can act on it right away — for example, play a sound, show a “Step complete” message, or light up the next part to install. Watching a part this way doesn’t change it in any way.
Inputs
| Port | Type | What to connect |
|---|---|---|
| Enable | True / false | Switches this event on or off. Leave it on (the default is true) to watch for the part being assembled. Set it to false to turn the event off — while off, it will not fire. |
| SceneNode | Scene node | The part you want to watch. Connect the part from your assembly that should trigger this event when it is fully put into place. |
Outputs
| Port | Type | What you get |
|---|---|---|
| Execute | Trigger | Fires once each time the watched part becomes fully assembled. Connect it to whatever should happen next. |
| SceneNode | Scene node | The same part you were watching, handed back so you can use it in the steps that follow. |
Example
| Enable input | true |
| SceneNode input | The Front Wheel part of your assembly |
| Execute output | Fires the instant the Front Wheel is fully assembled |
| SceneNode output | Hands back the Front Wheel so you can highlight it or play a confirmation sound |
Tips
- You don’t need to start this event from another node — it watches the part and fires by itself the moment the part is fully assembled.
- Connect the SceneNode output to the next action so it works on the exact part that was just put into place.
Node Disassembled
Fires the moment a part in a VR assembly becomes fully taken apart — all the way out of place, not just loosened.
What it does
This node watches one part and waits for it to become fully disassembled. In SimLab’s assembly system a part moves through three stages — think of a screw: tightened down (fully assembled), dropped into place but not tightened (partially assembled), or all the way out (fully disassembled). The instant the part reaches that last stage — completely out of place — this node fires on its own.
It does not run as a step in a sequence and it never moves or changes the part — it only watches and reacts. When the part comes all the way out, the Execute output fires once and hands the same part back on its SceneNode output, so you can act on it in your response — for example mark a disassembly step complete or play a sound. You can switch the watching on or off with the Enable input.
Inputs
| Port | Type | What to connect |
|---|---|---|
| Enable | True / false | Switches this event on or off. It is on by default (true), so you can leave it unconnected. Set it to false — or feed it a true/false value from elsewhere — when you want to stop the event from firing; while it is false the node ignores the part coming apart. |
| SceneNode | Scene node | The part you want to watch — for example a Bolt_01 object from your assembly. The node fires the moment this part becomes fully disassembled. |
Outputs
| Port | Type | What you get |
|---|---|---|
| Execute | Trigger | Fires once each time the watched part becomes fully disassembled — the instant it comes all the way out of place. Wire this to whatever should happen next, such as marking the step done, playing a confirmation sound, or moving on to the next part. |
| SceneNode | Scene node | Hands back the same part you were watching, so you can act on it in your response — for example pass it on to a node that hides it or highlights it. It is the same object you connected to the input, unchanged. |
Example
| SceneNode input | Bolt_01 |
| Enable input | true — the event is watching (leave it unconnected for the same result) |
| Execute output | Fires the instant Bolt_01 is backed all the way out — you could use it to mark the disassembly step complete and play a confirmation sound |
| SceneNode output | Bolt_01 — the same part, ready to pass on to whatever acts on it next |
Tips
- This event fires once, at the moment the part comes fully out — not continuously while it stays out. If you instead need the current “is it fully out?” answer as a true/false value at any time, use the matching Node Fully Disassembled state node on the Assembly page.
- A part that is only loosened or seated but not all the way out does not fire this event — it fires only when the part is completely disassembled.
- Use the Enable input to turn the event off during parts of your scene where a part coming apart shouldn’t trigger anything.
When a part becomes ready (or stops being ready)
Node Can be Assembled
Fires on its own the moment a part in a VR assembly becomes ready to be put on next — that is, when it finally becomes this part’s turn in the assembly order.
What it does
In a VR assembly, parts go on in a set order, and some parts can only be added once the parts before them are already in place. This event keeps an eye on the one part you connect and waits for the moment it becomes ready — the instant everything that has to come before it is assembled, so it is now this part’s turn. The event does not run as part of a sequence; it watches quietly on its own and goes off by itself at that exact moment.
When that moment arrives, the event fires once and hands you back the same part you connected, so you can act on it right away — for example highlight it or show a hint that it is ready to be fitted next. It only watches and reacts; it never assembles the part or changes anything in your scene. You can switch the event off and on with the Enable input.
Inputs
| Port | Type | What to connect |
|---|---|---|
| Enable | True / false | Switches the event on or off. It is on by default, so you can usually leave it alone. Connect a true/false value if you want to turn the event off at certain times — while it is false, the event will not fire even when the part becomes ready. |
| SceneNode | Scene node | The part you want to watch — for example a Bolt_01 object from your assembly. The event fires the moment this part becomes allowed to be assembled next. |
Outputs
| Port | Type | What you get |
|---|---|---|
| Execute | Trigger | Fires once each time the part becomes ready to be assembled — the instant the last part that had to come before it is finally in place. Wire this to whatever should happen then, such as highlighting the part or showing a “fit this next” hint. |
| SceneNode | Scene node | Hands back the same part you connected, so you can act on it in whatever runs next — for example pass it straight into a node that highlights or selects it. |
Example
| SceneNode input | Bolt_01 |
| Enable input | true — the event is watching (the default) |
| Execute output | Fires the instant the Housing and Gear that come before Bolt_01 are in place — it is now the bolt’s turn, so you could highlight it to guide the trainee to fit it next |
| SceneNode output | Hands back Bolt_01 so you can highlight or select that exact part |
Tips
- This event fires only at the moment the part becomes ready — not over and over while it stays ready. If the part is already ready when your scene starts, the event waits until the answer leaves and returns to ready before firing again.
- Leave Enable on for normal use. Connect a true/false value to it only when you want to silence the event during certain parts of your scene.
- This event only reacts to readiness — it never assembles the part. Combine it with your assembly steps to guide the trainee through the parts in the right order.
Node Can Not be Assembled
Fires on its own the moment a part in a VR assembly is not allowed to be put on next — that is, when it is not yet this part’s turn in the assembly order.
What it does
In a VR assembly, parts go together in a set order, and a part can only be added once the parts that come before it are already in place. This event watches one part and waits for the moment it becomes not ready to be assembled — for example, an earlier part it depends on is still missing or has just been taken back off, so it is no longer this part’s turn. When that happens, the event fires once on its own and hands you back the same part so you can react.
You don’t run this event yourself and you don’t wire anything into it from an earlier step — it simply listens while your scene plays and fires the instant the part stops being allowed to go on next. It only watches; it never assembles the part or changes anything in your scene. Use the Enable input to switch the watching on or off, and connect the Execute output to whatever should happen at that moment, such as hiding a hint or dimming the part’s highlight.
Inputs
| Port | Type | What to connect |
|---|---|---|
| Enable | True / false | Switches this event on or off. It is on by default, so the event watches the part and fires when the moment comes. Connect a true/false value to turn the watching off — while it is off (false), the event will not fire, no matter what happens to the part. |
| SceneNode | Scene node | The part you want to watch — for example a Bolt_01 object from your assembly. The event fires when this part becomes not allowed to be assembled next. |
Outputs
| Port | Type | What you get |
|---|---|---|
| Execute | Trigger | Fires once each time the part becomes not allowed to be assembled next — the instant it stops being this part’s turn. Wire this to whatever should happen then, such as hiding a “fit this next” hint or turning off the part’s highlight. |
| SceneNode | Scene node | Hands back the same part you were watching, so you can act on it in response — for example pass it straight into a node that hides it or changes its color. The part itself is not changed. |
Example
| Enable input | true — the event is watching (the default) |
| SceneNode input | Bolt_01 |
| Execute output | Fires the instant Bolt_01 is no longer the part allowed to go on next — for example the Gear that has to come before it has just been taken back off. You could hide the “fit the bolt” hint until its turn comes around again. |
| SceneNode output | Bolt_01 — the same part, ready to send into the node that turns off its highlight |
Tips
- This is the opposite of Node Can be Assembled: that event fires when it becomes the part’s turn to go on, and this one fires when it stops being its turn. Use the two together to highlight a part the moment it is ready and clear the highlight the moment it isn’t.
- Set Enable to
falsewhen you want to stop reacting — for example once a guided step is finished — so the event no longer fires. - This event only reports; it never assembles the part or moves it. Pair it with your normal assembly steps to guide the trainee through the parts in the right order.
Node Can be Disassembled
Fires on its own the moment a part in a VR assembly becomes the next one allowed to be taken off.
What it does
In a VR assembly, parts come apart in a set order — some parts can only be removed once the parts on top of them have already been taken off. This node keeps an eye on one part you choose and waits for the moment it becomes that part’s turn to be removed: when everything that had to come off before it is already off, the event fires.
It fires by itself the instant that happens — you don’t run it from another node. Each time it fires, it also hands you back the part it is watching, so you can act on that exact part in response (for example, highlight it to guide the trainee). It only watches and reacts — it never moves or takes apart the part itself.
Inputs
| Port | Type | What to connect |
|---|---|---|
| Enable | True / false | Switches the event on or off. It is on (true) by default, so you can usually leave it alone. Set it to false when you want to ignore this event for a while — while it is off, the event will not fire. |
| SceneNode | Scene node | The part you want to watch — for example a Bolt_01 object from your assembly. The event fires when this part becomes the next one allowed to be taken off. |
Outputs
| Port | Type | What you get |
|---|---|---|
| Execute | Trigger | Fires once the moment it becomes this part’s turn to be taken off — that is, when the last part that had to come off before it is finally removed. Wire this to whatever should happen next, such as highlighting the part or showing a hint. |
| SceneNode | Scene node | The same part you connected on the way in, handed back so you can act on it right away — for example pass it into a node that highlights it or shows its name. |
Example
| SceneNode input | Bolt_01 |
| Enable input | true — the event is on and watching |
| Execute output | Fires the instant the Cover that sits over Bolt_01 is removed — the bolt is now the next part allowed to come off, so you could highlight it to guide the trainee to remove it next |
| SceneNode output | Bolt_01 — handed back so you can highlight it or show its name |
Tips
- This is an event — it fires on its own when the part’s turn comes. You don’t connect it after another node; instead you connect its Execute output to what should happen.
- Use the SceneNode output rather than naming the part again downstream — it is already the exact part the event watched.
- To pause this event for part of your scene, set Enable to
false; set it back totrueto start watching again.
Node Can Not be Disassembled
Fires the moment a part stops being the one allowed to be taken off next in the assembly order.
What it does
In a SimLab assembly, parts come apart in a set order, and at any moment only certain parts are allowed to be removed. This event watches the part you connect and fires on its own the instant that part is no longer the one allowed to be taken off next — for example, when an earlier part that had to come off before it is put back, so it is no longer this part's turn to remove.
It does not watch for the user trying to remove the part, and it does not change anything in the scene. It simply notices the change in the order and hands you back the same part so you can react — show a hint, lock something, play a sound, or update a score.
Inputs
| Port | Type | What to connect |
|---|---|---|
| Enable | True / false | Switches the event on or off. Leave it true (the default) to have it watch the part. Set it to false to turn the event off so it will not fire. |
| SceneNode | Scene node | The part you want to watch — the assembly piece whose turn-to-be-removed you care about. |
Outputs
| Port | Type | What you get |
|---|---|---|
| Execute | Trigger | Fires once each time the watched part stops being the one allowed to be taken off next. Wire it to whatever should happen in response. |
| SceneNode | Scene node | Hands back the same part you were watching, so you can act on it in your response. |
Example
| SceneNode input | Brake Caliper |
| Enable input | true |
| Execute output | Fires the moment the Brake Caliper is no longer allowed to be taken off next — for instance, after the Mounting Bolt that comes off before it is put back on. |
| SceneNode output | Brake Caliper — ready to dim, lock, or show a “not yet” hint on. |
Tips
- This is an automatic event — it fires on its own when the order changes. You do not need to trigger it from another node.
- Use it together with Node Can be Disassembled to react both when a part becomes allowed to be removed and when it stops being allowed.
- To pause this event during part of your scene, feed the Enable input a
falsevalue; switch it back totrueto resume watching.
SceneState
SceneState Applied
Reacts the moment a saved scene state is switched on in your scene.
What it does
A scene state is a saved arrangement of your scene — which objects are shown or hidden, where they sit, the materials they use, and so on. This node watches for one of those saved states being applied, and fires the instant it happens. You can use it to start something automatically whenever the scene changes to a particular look — play a sound, show a message, move on to the next step, and so on.
If you connect a specific scene state to the SceneState input, the node only fires when that exact state is applied. Leave it empty to react to any scene state being applied. The node simply listens — it doesn’t apply or change any state itself, and it passes the applied state straight through so you can use it further down the line.
Inputs
| Port | Type | What to connect |
|---|---|---|
| Enable | True / false | While this is true the event is active and will fire. Set it to false to switch the event off so it stops reacting. |
| SceneState | Scene state | The specific saved scene state to watch for. Connect one to react only when that state is applied. Leave it empty to react to any scene state being applied. |
Outputs
| Port | Type | What you get |
|---|---|---|
| Execute | Trigger | Fires each time a matching scene state is applied. Wire this to whatever you want to happen next. |
| SceneState | Scene state | The scene state that was just applied, passed along so you can use it in the steps that follow. |
Example
| Enable input | true |
| SceneState input | The saved state named Doors Open |
| Execute output | Fires the moment the Doors Open state is applied |
| SceneState output | Hands on the Doors Open state for the next node to use |
Tips
- Leave the SceneState input empty if you want to react to every scene state change rather than one in particular.
- Turn the event off at any time by setting Enable to false — handy when you only want to listen during part of your experience.
SceneNode \ Grab
These events fire when a user picks up or lets go of a scene object in VR. Use them to react the moment an object is grabbed or released — for example to highlight a tool when it is held, or reset it when it is put down. Each event also tells you which user did it.
Grab events
Node Grab Started
Reacts the moment a user picks up (grabs) a chosen object in your scene.
What it does
This is an event. It doesn’t wait for another node to start it — it watches a specific object in your scene and fires on its own the instant a user grabs that object. This is the ideal place to begin an action that should happen when someone first takes hold of something, like a tool, a handle, or a part to assemble.
Each time the grab happens, the node hands you the object that was grabbed and the user who grabbed it, so you can react to exactly who did what. It only watches while its Enable input is true — turn that off and the event stops listening.
Inputs
| Port | Type | What to connect |
|---|---|---|
| Enable | True / false | While this is true the event is active and listening for the grab; set it to false to switch the event off. If you leave it unconnected it stays on. |
| SceneNode | Scene node | The object in your scene to watch. The event fires when a user grabs this object. (The viewer start position can’t be used here.) |
Outputs
| Port | Type | What you get |
|---|---|---|
| Execute | Trigger | Fires when the chosen object is grabbed. Wire this onward to the action you want to start. |
| SceneNode | Scene node | The object that was grabbed — the same one you chose to watch. |
| User | User | The user who grabbed the object, so you can tell who performed the action. |
Example
| SceneNode input | Wrench |
| Enable input | true |
| Execute output | Fires the moment a user picks up the wrench |
| SceneNode output | Wrench |
| User output | Trainee 1 |
Tips
- Pair this with Node Grab Ended to know both when the user takes hold of the object and when they let go.
- Use the User output in a multi-user session to react only to the person who actually grabbed the object.
Node Grab Ended
Reacts the moment someone lets go of an object they were holding in your scene.
What it does
This node watches a scene object and fires the instant a user releases their grip on it — the end of a grab. It runs on its own; you don’t wire it after another node. As long as its Enable input is true, the node stays on the lookout. Each time a grab on the watched object ends, the node fires and tells you which object was let go and which user let go of it.
Use it to react when a tool is set down, a part is dropped into place, or a handle is released — for example, snapping an object to a holder, playing a sound, or scoring a step in a training task. Watching for the release doesn’t change the object in any way; it simply notices the moment it happens.
Inputs
| Port | Type | What to connect |
|---|---|---|
| Enable | True / false | Turns the watch on or off. While this is true the event is active; set it to false to switch the event off. Leave it true if you always want to react to releases. |
| SceneNode | Scene node | The object in your scene to watch. The node fires when a user lets go of this object. (The viewer’s start position can’t be used here.) |
Outputs
| Port | Type | What you get |
|---|---|---|
| Execute | Trigger | Fires each time someone lets go of the watched object. Wire this to whatever should happen next. |
| SceneNode | Scene node | The object that was just released — the same object you were watching. Handy when the same logic watches more than one object. |
| User | User | The person who let go of the object, so you can react to who performed the action. |
Example
| Enable input | true |
| SceneNode input | Your Wrench object |
| Execute output | Fires the moment the wrench is let go — wired to snap it back onto the tool rack |
| SceneNode output | The Wrench that was released |
| User output | The trainee who set the wrench down |
Tips
- Pair this with Node Grab Started to handle both ends of an interaction — one reacts when an object is picked up, this one when it’s put down.
- To stop reacting to releases for a while (for example during a cutscene), feed Enable a false value, then set it back to true when you want the watch to resume.
SceneNode \ Hover
These events fire when a user points at or moves away from a scene object in VR (without grabbing it). Use them to react as an object is hovered — for example to highlight it, show a label, or hide that hint again when the user looks elsewhere. Each event also tells you which user did it.
Hover events
Node Hover Started
Reacts the moment a user begins pointing at (hovering over) a chosen object in your scene.
What it does
This event fires the instant a user’s pointer or gaze starts resting on the object you connect to it — for example when someone aims their VR controller at a machine part or moves their cursor onto it. It fires once at the start of each hover; it does not keep firing while the pointer stays on the object.
When it fires, it hands you the object that was hovered and the user who started the hover, so you can light up the object, show a label, or play a sound. It only watches for hovers while its Enable input is true, and it never changes the object itself.
Inputs
| Port | Type | What to connect |
|---|---|---|
| Enable | True / false | While this is true the event is active and watches for hovers; set it to false to switch the event off. Defaults to true, so you can leave it unconnected to keep it always on. |
| SceneNode | Scene node | The object in your scene you want to watch. The event fires when a user starts hovering over this object. (A viewer start position cannot be used here.) |
Outputs
| Port | Type | What you get |
|---|---|---|
| Execute | Trigger | Fires when a user starts hovering over the object. Wire this to whatever should happen next, such as highlighting the object or showing a tooltip. |
| SceneNode | Scene node | The object that was hovered over. Handy when one event watches several objects and you want to know which one was pointed at. |
| User | User | The user who started the hover. Useful in shared sessions where more than one person can point at objects. |
Example
| Enable input | true |
| SceneNode input | The Control Panel Button object |
| Execute output | Fires the moment the user aims at the button |
| SceneNode output | The Control Panel Button object |
| User output | The user who pointed at it, e.g. Trainee 1 |
Tips
- Pair this with a “Node Hover Ended” event to turn a highlight on when the hover starts and off again when it stops.
- Set Enable to false to pause the hover reaction during parts of your scene where it should be ignored.
Node Hover Ended
Reacts the moment a user stops pointing at (or looking at) a particular object in your scene.
What it does
This node watches one object you choose. While it is switched on, it fires the instant a user’s hover leaves that object — for example when they move their controller, gaze, or cursor away from it after hovering over it. It’s the natural partner to a hover-start event, letting you undo a highlight, hide a tooltip, or reset an object once the user looks elsewhere.
Each time it fires, it hands you the object the user stopped hovering over and the user who did it, so you can respond to exactly the right thing. It only watches and reports — it doesn’t change the object in any way.
Inputs
| Port | Type | What to connect |
|---|---|---|
| Enable | True / false | While this is true the event is active and watching. Set it to false to switch the event off so it stops firing. |
| SceneNode | Scene node | The object in your scene to watch. The event fires when a user stops hovering over this object. (The viewer start position cannot be used here.) |
Outputs
| Port | Type | What you get |
|---|---|---|
| Execute | Trigger | Fires when the user stops hovering over the chosen object. Wire this to whatever should happen next. |
| SceneNode | Scene node | The object the user stopped hovering over — handy when you want to act on that same object. |
| User | User | The user whose hover just left the object. Useful in shared sessions to tell who did it. |
Example
| Enable input | true |
| SceneNode input | The Control Panel Button object in your scene |
| Execute output | Fires when the user moves their pointer off the button — wire it to a node that removes the button’s highlight |
| SceneNode output | Control Panel Button |
| User output | The user who was hovering, e.g. Trainee 1 |
Tips
- Pair this with a hover-start event on the same object: start the highlight when hovering begins, and use this node to remove it when hovering ends.
- To stop watching at any time, feed a false value into Enable — the event will go quiet until you switch it back on.
Sequence
These events fire in response to what a playing sequence does, so you can react automatically when a sequence reaches a key moment — without having to start the check yourself.
Sequence events
Sequence Ended
This node lets your scene react the moment a sequence finishes playing.
What it does
This is an event node, so it runs on its own — you don’t wire anything into it to start it. It watches the sequence you give it, and the moment that sequence reaches its end, the node fires. You can use it to start the next thing in your scene, show a message, or move on to another step once the animation or playback has completed.
It only watches; it doesn’t change the sequence in any way. While its Enable input is true the event is active and listening; turn that off and the node simply stops reacting until you switch it back on.
Inputs
| Port | Type | What to connect |
|---|---|---|
| Enable | True / false | While this is true the event is active and watching the sequence; set it to false to switch the event off. If you leave it unconnected it stays on. |
| Sequence | Sequence | The sequence you want to watch. The node fires once this sequence finishes playing. |
Outputs
| Port | Type | What you get |
|---|---|---|
| Execute | Trigger | Fires each time the watched sequence ends. Wire this to whatever you want to happen next. |
| Sequence | Sequence | The same sequence that just ended, passed along so you can use it in the steps that follow. |
Example
| Enable input | true |
| Sequence input | Your Door Opening sequence |
| Execute output | Fires the moment the door has finished opening — connect it to play a sound or reveal the next instruction. |
| Sequence output | The Door Opening sequence, handed on to the next node. |
Tips
- Use the Enable input to turn this event on only when it matters — for example, switch it off during an intro so an early sequence ending doesn’t trigger your next step too soon.
Boolean
These events watch a true/false value and fire the moment it changes — so you can start something the instant a condition becomes true, becomes false, or simply flips either way. They never change the value they are watching; they only react to it.
Boolean events
On True
Watches a true/false value and fires the moment it turns true.
What it does
Connect any true/false value to this node, and it keeps an eye on it. Each time that value changes from false to true, the node fires — letting you start whatever should happen at that moment. For example, you can use it to react the instant a door becomes open, a switch is flipped on, or a task is marked complete.
The node only watches and reacts; it never changes the value it is watching. It stays active as long as its Enable input is true, so you can switch the whole watch on or off whenever you like.
Inputs
| Port | Type | What to connect |
|---|---|---|
| Enable | True / false | While this is true the event is active and watching. Set it to false to switch the event off. It is on by default. |
| Boolean State | True / false | The true/false value to watch. The node fires each time this value turns true. |
Outputs
| Port | Type | What you get |
|---|---|---|
| Execute | Trigger | Fires each time the watched value turns true. Wire this to whatever you want to happen at that moment. |
Example
| Enable input | true |
| Boolean State input | The “door is open” value from a door sensor |
| Execute output | Fires the instant the door becomes open — for example, to play a sound or show a message |
Tips
- This node reacts only when the value changes to true, not for the whole time it stays true. If you need something to keep running while the value is true, use a node that checks the ongoing state instead.
- To pause watching without removing the node, set Enable to false.
On False
This event runs part of your scene whenever a true/false value turns false.
What it does
On False watches a true/false value you give it. The moment that value changes to false, this event fires and runs whatever you have connected to its output. It only watches while it is switched on, so you can turn it off when you don’t need it.
Use it to react to something turning off — for example a light switching off, a door closing, or a checkbox being cleared. It only reacts to the value becoming false; it doesn’t change the value it is watching.
Inputs
| Port | Type | What to connect |
|---|---|---|
| Enable | True / false | While this is true the event is active and will react when the watched value turns false. Set it to false to switch the event off. It is on by default. |
| Boolean State | True / false | The true/false value to watch. The event fires when this value becomes false. |
Outputs
| Port | Type | What you get |
|---|---|---|
| Execute | Trigger | Fires each time the watched value turns false. Connect this to whatever you want to run at that moment. |
Example
| Enable input | true |
| Boolean State input | Wired from a “Light is on” value — when the light is switched off this becomes false |
| Execute output | Fires the moment the light turns off — for example to play a “lights out” sound |
Tips
- On False reacts only when the value changes to false. If the value is already false when the event becomes active, it waits for the next time it turns false again.
- Pair it with On True if you want to react both when something turns on and when it turns off.
On Change
Watches a true/false value and reacts the moment it flips from true to false or from false to true.
What it does
This is an event — it doesn’t wait for another node to start it. As long as it’s switched on, it keeps an eye on the true/false value you feed into it. Each time that value changes (true becomes false, or false becomes true), the node fires once.
It only reacts to a change, not to the value simply staying the same. So if the value is true and stays true, nothing happens; the node only acts at the moment of the switch. It doesn’t alter the value it’s watching — it just notices when it moves and lets the next part of your scene run.
Inputs
| Port | Type | What to connect |
|---|---|---|
| Enable | True / false | While this is true the event is active and watching for changes; set it to false to switch the event off. It starts switched on. |
| Boolean State | True / false | The true/false value you want to keep an eye on — for example whether a door is open, whether a switch is flipped, or whether the trainee is inside a zone. The node fires whenever this value changes. |
Outputs
| Port | Type | What you get |
|---|---|---|
| Execute | Trigger | Fires once each time the watched value changes. Wire this into whatever should happen in response. |
Example
| Enable input | true — keep watching the whole time |
| Boolean State input | Whether the safety valve is open (a true/false value from the scene) |
| Execute output | Fires the moment the valve opens or closes — for example to play a sound or show a message |
Tips
- This node reacts to both directions of change — on becoming true and on becoming false. If you only care about one direction, add a check after it for the current value.
- Turn the watching off at any time by feeding
falseinto Enable, then back on withtrue.