Execution
 Custom Event

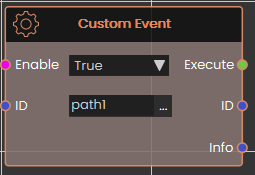
This event is activated manually by the user. It's useful when you want multiple different paths or actions to lead to the same response.
To set it up, use the Trigger Custom Event response and assign it a unique ID (e.g., path1). You can place this trigger in as many locations as needed.
Whenever a Trigger Custom Event is called, it will execute the Custom Event that has a matching ID.
If you want to pass additional info, you can use the info field in Trigger Custom Event response, this data will be passed to the even in the info port
 Scene Start

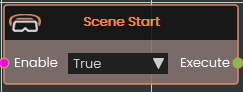
This event is triggered automatically when the scene begins. Use it to initialize elements at startup, such as playing videos, running background animations, or any other setup tasks.
Note: Since this event fires the moment the scene loads, it's recommended to add a small delay before making additional scene changes — this ensures all scene elements have fully initialized before anything else runs.
 Ticker
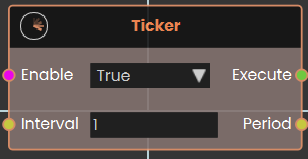
The Ticker event node functions as a continuous, time-based loop that repeatedly activates subsequent nodes at a consistent rate. As long as its Enable input is set to True, the node constantly triggers its Execute output every time the duration specified in the numerical Interval input (measured in seconds) elapses. Once activated, it continually outputs this time value through the Period pin, allowing the logic flow to perform recurring actions or background checks for as long as the node remains enabled.
Example:
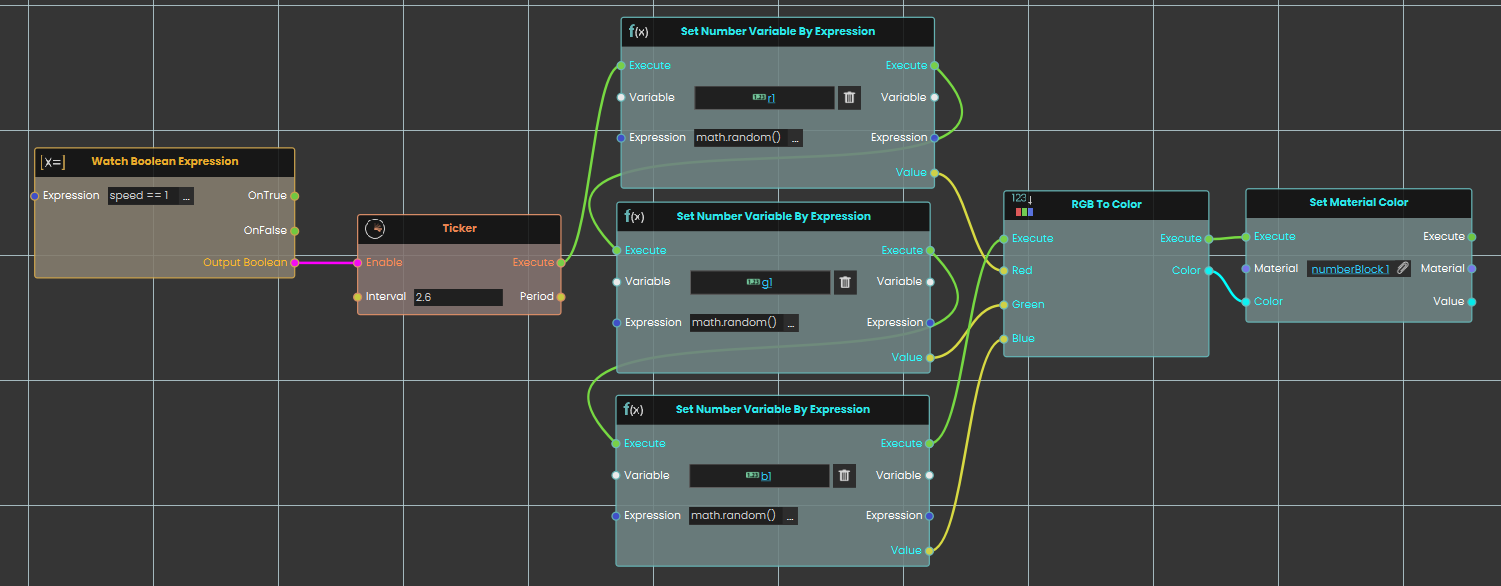
In this example, we use the Ticker node to create a loop that randomly changes a material's color every 2.5 seconds:
-
A Watch Boolean Expression node continuously monitors the "speed1" variable and activates the Ticker node once the value equals 1.
-
While enabled, the Ticker node creates a continuous loop that triggers its execution output every 2.5 seconds.
-
The Ticker simultaneously executes three Set Number Variable By Expression nodes to generate random values using the
math.random()function for the variables r1, g1, and b1. -
These three random numbers are passed into an RGB To Color node, where they are combined to formulate a new color.
-
Finally, this new color is sent to a Set Material Color node, which immediately applies the randomly generated color to the target material.
 Error
Error

Fires whenever an error happens while your experience is running, and hands you a message describing what went wrong.
What it does
This node is a safety net. Unlike most nodes, you do not trigger it from an earlier node — it listens on its own in the background while your experience runs. If an error occurs, its Execute output fires and its Error Message output gives you the text of that error. Instead of letting a problem pass unnoticed, you can respond to it — show the user a clear message, make a note of what happened, or move things to a safe state.
Turning it on and off
The Enable input controls whether the event is listening. It is on by default, so the node starts catching errors as soon as your experience begins. If you only want to catch errors during a certain part of your experience, connect a Yes/No value to Enable and switch it on and off as needed; while it is off, the event stays quiet and its Execute output will not fire.
Inputs
| Port | Type | What to connect |
|---|---|---|
| Enable | True / false | Optional. Whether the event is listening for errors. On by default — leave it on to catch errors the whole time, or connect a Yes/No value to switch it on and off. |
Outputs
| Port | Type | What you get |
|---|---|---|
| Execute | Trigger | Fires the moment an error occurs while the event is enabled. Wire it to whatever should happen in response. |
| Error Message | Text | A short description of the error that occurred. |
Example
| Enable input | On (the default) |
| Execute output | Fires when an error happens |
| Error Message output | Could not load the requested file. — the exact wording depends on what went wrong |
Tips
- Respond to the problem. Wire Execute to something that handles it — show the user the Error Message, make a note of it, or move the scene to a safe state — rather than letting the error pass silently.
- Show the message. The Error Message output is plain text, so you can display it on a panel or pass it into another node.
- Limit when it listens. Leave Enable on to watch the whole time, or turn it off during parts of your experience where you would rather handle problems yourself.