
SceneNode \ Curve
The Curve nodes let you draw and control 3D lines directly inside the VR scene. A curve is a single line that runs through a series of points you place in 3D space, which makes it ideal for things like paths, routes, connectors, graphs, and live data visualizations. You start by creating a named curve, then add points to it one at a time; later you can move or remove individual points, or change the line's thickness and style at any moment.
Every curve has a unique Name, and that name is how all of the other curve nodes find the line they should act on. As you add points, each one is given a number called its Index. Point numbering starts at 1 — the first point you add is point 1, not point 0 — and that number is what the Remove Curve Point and Update Curve Point nodes use to target a specific point.
 Create Curve
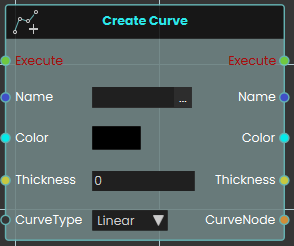
The Create Curve node initializes a new 3D cylindrical line within the VR scene. This is highly useful for creating dynamic visual elements like charts, graphs, or data visualizations.
When activated, it generates a base curve using four primary inputs: a unique text Name (which acts as an identifier required by all other curve-related nodes to target this specific line), a Color, a numerical Thickness value, and a CurveType dropdown that dictates whether the overall line behaves as a smooth curve or rigid straight lines. It then outputs a reference to the newly created CurveNode to continue the logic flow.
 Add Curve Point
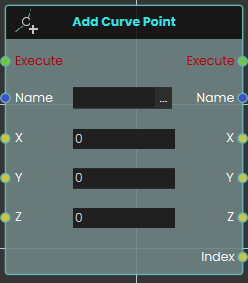
The Add Curve Point node builds upon an existing curve by generating a new point in 3D space. Once activated, the node locates the specific curve identified by the Name input and places a new point at the provided X, Y, and Z coordinates. The system automatically draws a line connecting this newly created point to the previously established point, seamlessly extending the curve. Crucially, this node outputs an Index value—a unique number assigned to this specific point when it is created. Point numbering starts at 1, so the first point you add has an index of 1 (not 0), the second has an index of 2, and so on. This number is the point's permanent identifier, and you use it later to target the point with the Remove Curve Point and Update Curve Point nodes.
Example:
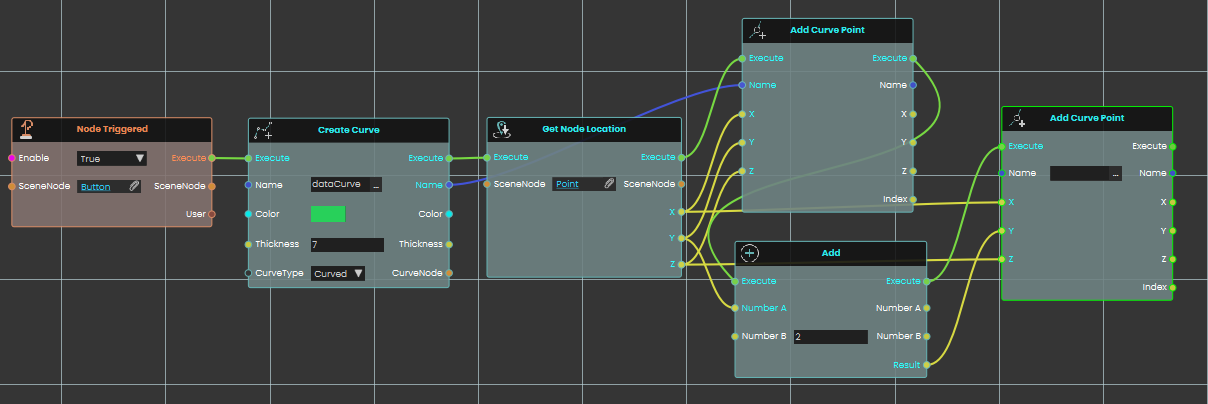
In this expanded example, we build an interaction where clicking a button initializes a new curve and sequentially places two connected points based on a target object's location:
-
A Node Triggered event node continuously listens for the user to interact with a specific "Button" object in the scene.
-
Once the button is clicked, it activates a Create Curve node, which initializes a new curve named "dataCurve" with a distinct green color, a thickness value of 7, and a "Curved" line type.
-
The execution flow immediately proceeds to a Get Node Location node, which retrieves the exact X, Y, and Z spatial coordinates of a target 3D object named "Point".
-
The first Add Curve Point node is activated. It takes the "dataCurve" identifier and utilizes the precise X, Y, and Z coordinates retrieved from the target object to generate the first anchor point of the curve.
-
Simultaneously, an Add math node receives the original Y coordinate from the "Point" object and adds a numerical value of 2 to it.
-
Following the creation of the first point, a second Add Curve Point node is executed. It uses the same "dataCurve" identifier and the original X and Z coordinates, but it uses the newly calculated result from the Add node (Y + 2) for its vertical placement. This generates a second point exactly 2 units directly above the first, automatically drawing a connected line between them.
 Remove Curve Point
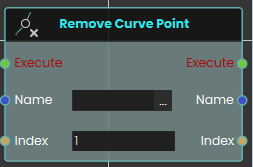
The Remove Curve Point node is used to permanently delete a specific point from an active curve. Once activated, it takes the curve's Name and the specific Index number of the point you wish to erase. Keep in mind that point numbering starts at 1, so an Index of 1 targets the first point of the curve, not the second — this is the same number that the Add Curve Point node returned when the point was created. Upon deletion, the curve automatically bridges the gap between the remaining adjacent points to maintain a continuous, unbroken line.
 Set Curve Thickness

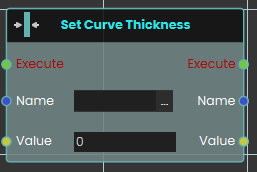
The Set Curve Thickness node dynamically adjusts the physical width of an existing curve during the VR experience. When activated, it targets the curve specified by the Name input and instantly changes its visual bulk to match the number provided in the Value input, allowing you to easily scale the visual prominence of the line on the fly.
 Set Curve Type

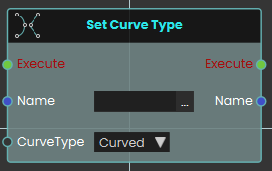
The Set Curve Type node instantly alters how the connections between a curve's points are visually rendered in the scene. Once activated, it locates the curve by its Name and applies the newly selected CurveType from the dropdown menu. This allows you to toggle a curve between "Curved" (which renders smooth, sweeping connections between the points) and "Linear" (which renders sharp, perfectly straight lines between the points) at any time.
 Update Curve Point

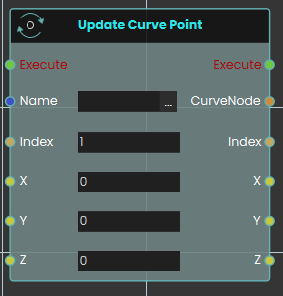
The Update Curve Point node allows you to dynamically change the 3D location of a previously created point on an existing curve. When activated, it targets the curve using the Name input and isolates a specific point using its numerical Index value. As with the other curve nodes, this Index starts at 1 (the first point is index 1, not 0) and matches the value that Add Curve Point returned when the point was added. It then instantly moves that point to the newly provided X, Y, and Z coordinates. The line connecting the points will automatically recalculate and redraw itself to reflect the point's new location in the scene.
No Comments